Thai Tacos

I don’t have much time during the average work week to tackle culinary projects more elaborate than a sandwich, tossed salad or filet of baked fish, and so, I often spend my glimmers of down-time during the week planning for the weekend by researching recipes and stocking up on any needed groceries. That way, I can devote long lazy weekend days at home to food prep, cooking and enjoying the fruits of my labors.

There came a weekend when a particular combination of cravings, left-overs, and on-hand-ingredients (after all, the art of thrift and avoidance of wastefulness calls for using the surplus items of previous culinary projects — some items sooner than later!) left me torn between taking on a Mexican or a Thai cooking project. Mulling over this dilemma, an idea occurred to me… could there be a tasty fusion of the two where mutual flavors and ingredients crossed paths? I pondered the peculiar idea of a Thai Taco — an idea that turned out not to be so revolutionary after all! I found many recipes online for this apparent fusion favorite. In the time since, I have experimented with a few different permutations of the recipe and have arrived at the one I like best.

A few notes… I like to make a large batch of pork at a time and freeze it in batches. The pork-to-marinade ratio need not be exact, and so you don’t have to adjust for somewhat higher or lower poundage of pork. Flavor may be a bit more pronounced if less pork is used and vice versa if more. If you want to use a significantly smaller or larger amount of pork, then you may want to scale the marinade up or down.

For the mix of fixin’s, I like to use a chopped salad kit from Aldi as my base for ease of preparation. It already contains cabbage, carrots and green onions chopped small. I simply set the dressing aside for a different use and add tomatoes, peanuts and basil to the base. I only use the peppers when I have them on hand from the garden. It makes the process a bit more streamlined, especially when using pork that’s been prepared ahead of time.

SARAH’S THAI TACOS

Pork & Marinade:
3-4 lbs boneless pork
1/4 cup fresh lime juice
1/4 cup thin soy sauce
3 Tbsp honey or packed brown sugar
2 Tbsp vegetable oil or light olive oil
1 Tbsp fish sauce
1 tsp sriracha
4 cloves garlic , minced
1 tsp ground ginger
1/3 cup chopped cilantro
1/3 cup chopped green onions

Peanut Sauce:
1/4 cup peanut butter
1 tablespoon lime juice
1 tablespoon thin soy sauce
1-2 teaspoons honey
1 teaspoon ground ginger
1/2 teaspoon garlic, minced
1 teaspoon sriracha
1 teaspoon fish sauce
1/4 cup hot water

Taco Fixin’s:
tomatoes, diced
cabbage, chopped small or shredded
sweet or hot peppers, julienne
green onions, chopped
carrots, shredded
peanuts, crushed and toasted
basil, snipped thin

corn tortillas, warmed

Combine the pork and marinade ingredients in a slow cooker. Cook on high for 4 hours or low for 8 hours, until pork shreds easily with a fork.

Meanwhile prepare the peanut sauce in a liquid-tight container. Allow to sit out at room temperature and shake container occasionally to combine ingredients. If ambient temperature is too cool or peanut butter is especially thick, you may need to stir with a fork to get it smooth.

Prepare Taco Fixin’s a bit ahead of time. They can be kept separately for a “taco bar” serving style, or tossed together like a salad and then added to each taco.

Heat a non-stick skillet or grill pan over medium heat. Warm the tortillas in pan, flipping after a minute or two. Tortillas should be a little bit browned, but still pliable and not too crispy.

Fill tortillas with shredded pork and fixin’s; drizzle with peanut sauce. Enjoy!
Rigatoni alla Scarmorza

My general culinary mindset over the past ten or so years has moved progressively in the direction of being lower and lower carb. Even if I don’t always use the substitutions I discover, my mind is always striving toward finding a logical and tasty low-carb substitute for foods that I eat. In recipes, even when I don’t eliminate carbs completely, I will reduce, for instance, using one tablespoon of sugar, rather than two. Some substitutions have proven to be more trouble than simply eating the carb less often-making cauliflower rice is such a to-do that I simply eat real rice, but on fewer occasions. But there is one carb for which there is no reasonable substitute; I only eat is once or twice a week on “cheat” days, but it is such a stronghold of my culinary repertoire, I simply cannot abandon it in my regular diet.

Pasta.

My relationship with pasta began with the common childhood infatuation with macaroni and cheese, but it has evolved to the point where pasta dishes are one of my strongest aptitudes in the kitchen. Somewhere along the line, I reached a threshold where I stopped ordering pasta at restaurants altogether because I could make any of my favorite pasta dishes easier and cheaper at home. The only time I eat pasta at a restaurant is when they make fresh pasta in-house; I do make my own fresh pasta at home on occasion, but it’s enough of a production to merit an appreciation of the restaurant variety.

But when it comes to any dish made with boxed store-bought pasta, my kitchen is the the only source. In part, it’s because I know every restaurant that serves boxed pasta is buying it for $1 from the same grocery store I am—that voluminous plate of pasta for $18 at your favorite mid-scale restaurant is a much bigger value-cheat than the $32 crab cakes.

More and more, however, the larger issue at hand is a particular proclivity I have developed over the years—I am an extreme al dente snob. It started when I spent a summer in college as roommates with a Mediterranean gal. It’s only grown since then. I like my boxed pasta extremely al dente. Fresh pasta is another story completely—I can enjoy a doughy fresh ravioli because it’s a completely different context. Only boxed pasta carries with it the culinary promise of al dente in the extreme.

Most pasta recipes I find online are a “no sweat” version of something I’ve tried before, or at the very least a novel re-combination of ingredients I’ve used before: “Okay, cool, so they put chicken in that…” or “…mushrooms in that…” etc. or “That’s a neat combination of spices, I’ll have to try that…”

This week, however, I ran into a recipe for a pasta dish that’s a bit apart from what I’ve tried before. It’s not so much that the methods were especially new or tricky (it’s not like we’re talking true from-scratch carbonara), but rather the ingredients were of a special caliber. At it’s heart, it’s a basic cheese-based cream sauce with stuff added. But the obtaining of the stuff was something of a challenge—many of the headlining ingredients were not available at my grocery darling, the Aldi. And many of the key ingredients were higher-brow. This was a luxury pasta dish, not an average Friday night pasta dish. That’s not to say I would pay $18 for it at a restaurant, but it presented an exciting project for my weekday grocery runs and my weekend test-kitchen.

Some ingredient notes. Scarmorza, as it turns out, is a particular type of Italian cheese that is similar to mozzarella and is often, but not always, smoked. In all the recipes I found for this dish, the smoke-flavor component was a large part of the taste-profile. Additionally, most recipes simply called for smoked mozzerella—which was hard enough to find, let alone a trip down to the Strip district in search of true scarmorza. And so, fresh smoked mozzerella is the key cheese in my recipe.

Secondly the recipe calls for peas, but I am not a fan of peas. I substitute shelled edamame for peas in most other recipes, and so I did the same here.

Lastly, the original recipes all call for prosciutto. But I feel like it’s something of a sin to bury prosciutto in a dish with so much other strong flavors, so I got pancetta cubes instead.

SARAH’S RIGATONI ALLA SCARMORZA

2 tablespoon unsalted butter
one medium onion, diced
2 cloves garlic, minced
1/2 cup dry white wine
2 tablespoons flour
2 cups half & half or heavy cream
1 teaspoon salt
1 teaspoon fresh black pepper
1/2 cup Parmigiano-Reggiano, grated
1/2 cup smoked mozzarella, grated
1/4 cup pancetta or prosciutto, diced
1/2 cup peas or shelled edamame
1/2 cup pistachio nuts, coarsely chopped
Fresh cracked black pepper
1 pound rigatoni pasta

Melt butter in a medium saucepan. Saute the onions until soft. Add the garlic. After a few minutes, deglaze with the wine. Add flour and stir until onions and garlic are coated. Add cream, salt, pepper, and cheeses. Once cheeses have melted, process with an immersion blender until smooth.

Meanwhile, cook the peas or edamame, if needed. Cook the pasta to desired done-ness. Drain the pasta and toss with sauce, peas/edamame and pancetta/proscuitto. Garnish with chopped pistachios and fresh ground pepper. Serve and enjoy!

This recipe turned out quite well, and I will likely make it again. However, I will note that it turned out well in an entirely predictable way. My pasta-with-cheese-sauce skills are pretty solid, and this dish was as good as any other that I make regularly. The extra ingredients—pistachios, pancetta, edamame—added some pleasant flavors, texture and color to the dish. But ultimately there was nothing about this dish that turned out especially amazing or surprising. It was worth the trouble of hunting down some harder-to-find ingredients, but in my opinion would not be worth $18 a plate at your local Italian eatery.

Massaman Curry

I’ve spoken recently about the conundrum of Thai curry paste. While it seems like a good idea, in theory, to make my own, the requirement of so many specialty ingredients to make a Thai curry paste even approaching authentic makes the prospect of a homemade paste more daunting than most culinary projects. As a result, I’ve been investing in some pre-made pastes.

It started when I found a good deal online for Thai Kitchen Red Curry Paste. I was in the mood to make my recipe for Thai Pumpkin Curry, and I knew I had used this brand of red curry paste before in that recipe to good success. In searching out this paste online, however, I encountered some other brands of curry paste not available in my average grocery store. I opted for the Thai Kitchen brand for the pumpkin curry, but when I discovered a recipe I wanted to try for Asian Meatballs in Green Curry Sauce, I remembered seeing those other brands and decided to give one a try. I ordered a jar of Mae Ploy Thai Green Curry Paste to use in the recipe. I was happy with the recipe and the flavor of the curry paste and so I went looking to see what other pastes they offered.

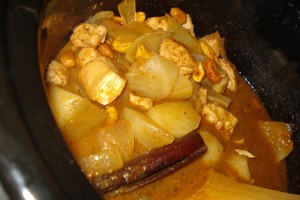
As it turned out, Amazon offers a variety of Mae Ploy curry pastes, including massaman! I was especially excited about the massaman paste. Since my discovery of turnips and their potato-like qualities, I’ve been anxious to try a massaman curry; potatoes are a rather iconic ingredient in this curry and I was excited to substitute turnip chunks as a good stewing vegetable. I also picked up a Mae Ploy Yellow Curry Paste, though I have admittedly never had a Thai Yellow Curry, but I was intrigued and it was on sale so I decided to buy it as well. Culinary adventures with yellow curry to come. But for now, massaman!

DSC02571SARAH’S MASSAMAN CURRY

2/3 cup unsalted peanuts

1 (14oz) can coconut milk
4 tbsp massaman curry paste
1-2 lbs. chicken breasts, cubed
2 lbs. turnips or potatoes, peeled and cubed
1 onion, cut in wedges
1 lime, juice and zest, or 1/4 cup lime juice
1 cinnamon stick
1/2 teaspoon cardamom
1 tsp tamarind paste (I use Tamicon concentrate)
1 tbsp brown sugar
2 tbsp fish sauce

Place the peanuts in a dry, non-stick skillet. Heat over medium-low fire, stirring often, until the peanuts are golden brown. In the alternative, place on a cookie sheet in the oven at 400. Check on and stir every five minutes until roasted. Set peanuts aside.

In a slow-cooker or large saucepan, combine coconut milk, curry paste, chicken, turnips (or potatoes), onion, and remaining ingredients. Simmer covered over low fire (for slow-cooker: 4 hours on high, or 8 hours on low) until chicken reaches desired done-ness. Toward the end of cooking, add the peanuts and heat through. Serve over rice (or cauliflower rice) and with other favorite Thai dishes.

Asian Meatballs in Green Curry Sauce

I stumbled onto a green curry meatballs recipe a couple weeks ago almost purely by accident. I don’t even remember now what I was looking for when I found it — something completely unrelated — but it caught my eye immediately!

I had recently purchased red curry paste in bulk online, and so I decided it might be a good time to acquire some green curry paste, as well. Normally I’m a fan of making my own curry spice blends, but I’ve found Thai pastes to be somewhat prohibitive. They require a large number of fresh ingredients; done properly they also require specialty produce (e.g. kaffir lime leaves, lemongrass, etc) that would require a special trip outside my daily comings and goings whenever I felt like cooking Thai — which happens rather frequently. And so, I decided I should invest in some prepared curry pastes.

I made a few key adjustments to the original recipe, many to make it low carb, but also the optional introduction of a bell pepper (I happened to have one around). Here’s what I ended up with:

DSC02410SARAH’S ASIAN MEATBALLS in GREEN CURRY SAUCE

Meatballs:
1/4 - 1/3 cup breadcrumbs
1 teaspoon minced garlic
2 tablespoons green onions, white and pale green parts, snipped
2 tbsp fresh cilantro or 1 tablespoon cilantro chutney
1 tbsp sesame oil
1 tbsp Thai sweet chili sauce
1 tsp fish sauce
1 lb ground meat

Green Curry Sauce:
7 oz coconut cream
7 oz water
4 tbsp Thai green curry paste
1 cup chicken broth
2 tbsp fish sauce
zest and juice of one lime
1 tbsp brown sugar
1 bell pepper, thinly sliced (optional)
2 tbsp fresh chopped basil (optional, to garnish)

Preheat the oven to 350. Combine all the ingredients for the meatballs — except the meat — in a medium bowl and whisk together well with a fork. Allow to sit for at least 30 minutes so that the liquid ingredients can hydrate the breadcrumbs.

Meanwhile combine all the sauce ingredients in a medium saucepan. For now, do NOT add the bell pepper or basil. Bring to a gentle simmer over a low fire.

Add the meat to your bowl of meatball ingredients. Combine well. Form the meatballs and place on a large shallow casserole dish or cookie sheet. Bake in the oven for 15 to 20 minutes, until the outside of the meatballs is golden brown.

Add the meatballs to your pan of curry sauce. If you’re using some bell pepper, add slices now. Simmer until peppers are cooked and meatballs are heated through.

Serve garnished with fresh basil.

Quesadilla Stuffed Peppers

There are a few foods I can’t help but miss on a low carb diet. Pizza is one of them, and the whole complement of tortilla-based Mexican dishes. Tortillas are difficult to substitute for. Rather than force some type of low-carb ingredient into tortilla form, I’ve found it’s often better just to approach the recipe from a different angle. Having had recent success taking such an approach with a pizza-inspired recipe, I decided to do the same with Quesadillas.

DSC02390SARAH’S QUESADILLA STUFFED PEPPERS

1/4 cup oil
1/2 cup lime juice
1/2 cup chicken broth
1 teaspoon garlic, minced
1 teaspoon chili powder spice blend
3 tablespoons chopped cilantro or cilantro chutney
1lb chicken

3 bell peppers
3/4 cups taco cheese, shredded

1 (10oz) can tomatoes with green chilis, drained
8 oz monteray jack cheese
green onions
sour cream

Combine oil, lime juice, chicken broth, garlic, chili powder, cilantro and chicken in a saucepan or crockpot. Simmer until chicken is done enough to shred with a fork; this will take several hours. Keep a saucepan on low, covered, stirring often; crockpot can be set to high. Expect 3-4 hours.

Preheat oven to 400. When chicken filling is getting close to ready, cut bell peppers in half; remove seeds and stems. Place insides up on a cookie sheet or in a large, shallow casserole dish. Distribute taco cheese evenly among pepper halves. Bake at 400 for 20-30 minutes, or until cheese gets a bit golden brown. Remove from oven and set aside.

In a large bowl, combine shredded chicken, tomatoes with chilis, and 4 oz of shredded monteray jack. Distribute filling evenly throughout the peppers. Shred or slice the remainder of the monteray jack. Top the peppers with the cheese. Bake on 400 another 20 to 30 minutes until the cheese is melted and a bit golden brown.

Garnish with green onions and sour cream and serve.

Bell Pepper Pizzas

Some low-carb substitutions are easier than others, and one of the most difficult is pizza. One option is a lower-carb baking mix to make the pizza’s crust, but any baking mix is going to have a significant enough carb count, even if it is lower than average. The Internet is teeming with recipes for cauliflower-based pizza crust, but those tend to be very labor-intensive, requiring cheesecloth to squeeze the cauliflower dry before the crust can even be assembled. That’s just too much fuss for my taste.

I prefer a more elegant low-carb solution, and the cauliflower crust seems forced. More up-my-alley are the suggestions to use a whole food, already somewhat pizza-sized and -shaped, as a base for a personal pizza. Portobello mushrooms, for instance, or a thick slice of eggplant. The one, however, that most caught my interest was the prospect of using bell peppers. The idea behind bell pepper pizzas is, essentially, to combine the logic of a stuffed pepper recipe with that of a personal pizza.

DSC02328SARAH’S BELL PEPPER PIZZAS

3 bell peppers
3/4 cup mozzarella cheese, shredded
1/3 cup pizza sauce or spaghetti sauce
1-2 roma tomatoes, sliced thin
pepperoni or other topping
6 provolone slices

Preheat oven to 400. Cut the bell peppers in half; remove stems and seeds. Line a large casserole pan with tin foil or parchment paper. Arrange the bell pepper halves, insides up, in the casserole pan.

Sprinkle the shredded mozzarella over each bell pepper half. Roast at 400 until the cheese is golden brown, about 20-30 minutes. Remove from the oven and allow to cool some.

Put one or two tablespoons of red sauce in each pepper. Add roma slices. If using a topping, such as pepperoni, put some inside the pepper and reserve some for on top. Cover each pepper with a round slice of provolone. Add toppings on the provolone.

Bake in the oven for another 20 to 30 minutes until the cheese is melted and a bit golden brown. Serve and enjoy!

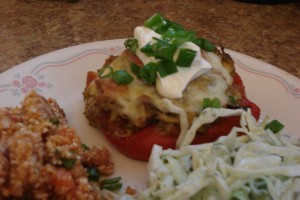
These turned out quite well. Since roasted red peppers are one of my favorite pizza toppings, it should come as no surprise, I suppose. The bell peppers created a great base for the pizza in terms of size and shape, added an excellent complementary flavor without adding significant carbs. Much recommended!

Swedish Meatballs

This recipe is a perennial favorite. So much so, that I was surprised to discover last week when I went to find the recipe that I had never posted it online before. Similar to stroganoff, in that it features meat in a creamy gravy, this dish can be served with rice, noodles or mashed potatoes (or other mashed veggies like turnips, cauliflower, squash, etc.). What sets it apart is the allspice flavor, an excellent and uncommon complement to otherwise familiar ingredients. Traditionally it is also served with a side of lingonberries or lingonberry preserves, but whole berry cranberry sauce works as an easy substitution.

Swedish-Meatballs-450SARAH’S SWEDISH MEATBALLS

1/2 cup breadcrumbs
1/2 cup light cream or half & half
1 tablespoon butter
1 onion, diced
2 teaspoons ground allspice
1 egg, beaten
salt
pepper
2 lbs. ground meat

2 tablespoons butter
2 tablespoons almond flour (or regular flour)
2 cups beef stock
1 cup sour cream
fresh dill or parsley, for garnish (optional)

Hydrate your breadcrumbs in a medium-large bowl by mixing them in with the cream. Allow to hydrate for at least 30 minutes. Fluff with a fork to ensure even hydration. Meanwhile, melt the butter in a saucepan or skillet to saute the onions.

When the onions are softened and the breadcrumbs thoroughly hydrated, combine these two in the bowl with the breadcrumbs. Add the allspice, egg, salt and pepper. Add the meat and mix thoroughly.

Form into meatballs and either brown in a skillet or bake in the oven in a large, shallow casserole dish at 350 until browned (about 20 minutes).

Meanwhile, melt the butter in a saucepan. Add the almond flour, or regular flour. Stir until the flour is thoroughly coated. Add the beef stock and simmer, stirring to make sure the flour is well-combined. Add the sour cream. I like to use an immersion blender to make sure the cream gravy is nice and smooth. Simmer on low and stir often until sauce has thickened.

Add the browned meatballs to the sauce and heat through. Serve garnished with dill or parsley, if desired, and a side of lingonberry preserves or cranberry sauce.

Crockpot Coq au Vin

Coq Au Vin is one of those cooking preparations I’ve randomly heard about over the years but didn’t really pay much attention to — I suppose it just always sounded like a dish best left to French restaurants. It entered my radar late last year when I had a fondue version of coq au vin at a restaurant, and so when I stumbled upon a crockpot version of this preparation a few weeks ago, it piqued my interest.

A bit of research indicates that Coq Au Vin is essentially poultry braised with wine. Cooking anything in wine seems like a great idea to me; I usually find myself inventing ways to add wine to recipes that don’t call for it. Braising, as it turns out, indicates that the meat should be pan seared before slow cooking in liquid, so the recipe does sound ideal for the crock pot. Apparently this cooking method was developed specifically for tougher, less expensive (right up my alley!) cuts of meat, to break down the tissues, making them more palatable. Also inherent in the braising approach is the purposing of the braising juices as a gravy. Everyone knows I adore mashed things with gravy, and so it seemed the perfect opportunity to try a promising new recipe while at the same time pouring it over a nice root vegetable mash on a crisp October day.

Coq Au Vin with Mashed Rutabaga

Coq Au Vin with Mashed Rutabaga

SARAH’S CROCKPOT COQ AU VIN

6 oz sliced bacon, chopped
2 lbs chicken tenderloins
1 onion, chopped
1 cup dry red wine
3 teaspoons garlic, minced
1/2 teaspoon dry rosemary, or 3 sprigs fresh
1 teaspoon salt
1⁄2 lb mushrooms
1⁄8 cup water (optional)
1 teaspoon cornstarch (optional)
2 green onions, chopped

Chop up bacon and fry until crisp (I like to use my kitchen scissors to cut the raw bacon into pieces before frying). With a slotted spoon, remove the bacon from the skillet and place in the crockpot.

Reheat the bacon fat and brown the tenderloins. Remove the chicken to the crockpot once seared. Add the onions to the remaining bacon fat. Saute briefly, until onions soften. Add wine to the skillet. Scrape down the sides of the skillet and then pour the contents into the crockpot.

Add the garlic, rosemary and salt. Slow cook on high for 3 hours or low for 6 hours. Add the mushrooms about halfway through.

When your coq au vin is finished cooking, you can, optionally, turn the juice into a thicker gravy: mix cornstarch with the 1/8 cup water in a small bowl. Strain the crockpot cooking juices into a saucepan. Heat, slowly stirring in the cornstarch. Stirring often, cook until reduced and thickened.

Garnish with the green onions. Serve with a mashed root vegetable.

This recipe is admittedly not the simplest of crockpot recipes. There is a lot going on stovetop, as well. I didn’t opt to use the cornstarch for thickening, both to keep the carbs as low as possible and because I didn’t want to do one more transfer to a new pan. It worked out just as well treating the crockpot juices as more of an “au jus” gravy. There was not a ton of liquid leftover anyway, so I would say folks can certainly feel free to skip this step.

Italian-style Meatballs

It’s hard to go wrong with Italian meatballs. While not a difficult recipe to pull off with some success, there are some subtleties that can make a big difference in your result.

DSC02333SARAH’S ITALIAN-STYLE MEATBALLS

1/3 cup breadcrumbs
1/3 cup milk
1 large egg, slightly beaten
1/2 cup grated parmesan cheese
2 teaspoons minced garlic
1 teaspoon fresh ground black pepper
1/4 teaspoon dried oregano (optional, or to taste)
A few sprigs fresh parsley, snipped
2 lbs. ground meat
1 (24 oz) can tomato-based spaghetti sauce

Soak the breadcrumbs in the milk for at least 30 minutes. Do not skip this step. Well-soaked breadcrumbs will make a huge difference in your meatballs.

Mix the remaining ingredients in with the soaked crumbs. Form into meatballs. Brown the meatballs in a skillet. Finish cooking in a large saucepan or crockpot with tomato-based spaghetti sauce.

Parmesan Risotto with Cauliflower Rice

One of the staples of my recipe collection is risotto. I don’t always make it according to the “rules” (I often use long-grain instead of arborio rice, don’t hate me!), but slow-cooked skillet rice in a creamy, broth-based, wine-based sauce is perhaps second only to pasta with cheese sauce in my kitchen repertoire. It is a recipe that’s easy to change up, use a different cheese, add some vegetables (or occasionally fruit!), toss in some nuts, try a different spice mix… risotto is endlessly adaptable and delicious, but it sure as heck is not low carb.

My collection of successful cauliflower “rice” recipes continues to grow: Cilantro Lime “Rice,” Cauliflower Jambalaya, Tabbouleh Salad, Vegetable Biryani, Mexican Rice, etc. Is cauliflower “rice” risotto a real possibility? My greatest successes with substituting cauliflower for rice have come with dishes where I keep the cauliflower raw — it stays crispy, doesn’t leak too much water into the dish, doesn’t become slimy. I’ve encountered some cauliflower “rice” risotto recipes online, but they involve cooking the “rice” in the same manner one would with a traditional risotto, and I just can’t imagine that working out okay without facing the same consequences I’ve experienced when cooking cauliflower “rice.” Would it be possible to make the risotto as a sauce, sans cauliflower first, and then add the raw cauliflower at the end?

I set to finding out.

DSC02241SARAH’S CAULIFLOWER “RICE” PARMESAN RISOTTO”

6 cups cauliflower rice
2 tablespoons butter
1 onion, chopped
2 teaspoons minced garlic
1/2 cup white wine
3 bouillon cubes
1/2 cup cream or half & half
2 cups shredded parmesan or other white italian cheese
salt & pepper to taste

Rice your cauliflower. Fold into a clean kitchen towel and set aside.

Heat butter in a skillet. Saute the onion and garlic until softened. Add the white wine and bouillon cubes. Simmer until the cubes are dissolved and wine reduced by half. Add cream, cheese, salt and pepper. Simmer over low heat until cheese is melted. If the cheese gets clumpy as it melts, use an immersion blender to smooth it out. In the end, the cheese sauce should be thick and somewhat tacky, a good layer sticking to the spoon as you stir.

Allow to cool a bit. Still in the cauliflower rice. If you want to heat the rice up a bit, put the entire risotto mixture in a large, shallow casserole and heat uncovered in the oven at low temperature (200 or 250) until heated through. Serve with your favorite Italian meal and enjoy!

This dish actually turned out quite well. It’s not true risotto, of course, but it is a reasonable and tasty substitute.