Beef Bolognese

Sometimes recipe searches lead to unexpected places. In my ongoing search for new ideas to fuel low-carb recipe substitutions, I encountered a recipe for Beef Bolognese with spiralized rutabaga noodles. This recipe rang two distant bells of memory for me.

First, I have certainly heard of Bolognese before, but it is one of those continental recipes that has, over the years, simply buzzed along the outskirts of my recipe radar. In general, I’m don’t actively search for new Italian recipes, simply because I have a pretty thorough existing repertoire in that cuisine category. Bolognese is essentially Italian meat sauce, which is perhaps as non-novel an Italian recipe as one could imagine. Having stumbled upon this particular recipe, however, I found myself intrigued by the spice mixture. In addition to the typical Italian green spices like parsley and oregano, it also included cinnamon and cloves. The addition of these more fragrant dark spices to more traditional Mediterranean tomato sauce is a combination I’ve enjoyed before in Greek Pastitso. Upon further investigation of Bolognese recipes, I found that some included nutmeg as well as other ingredients that intrigued me. Also, I found recipes for Bolognese both with ground beef and the stew beef, the latter variation a timely upgrade, as my dad had requested I incorporate a beef roast into our meal this past weekend.

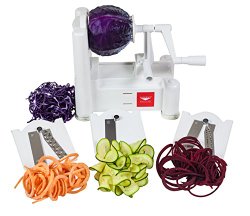
Second, the use of spiralized rutabaga turned out to be something of a eureka moment. Many years ago, when I was in high school, I hunted down a rutabaga and some other atypical root vegetables to try out a particular recipe back when I was on a 90’s-style low-fat healthy eating kick. At the time, my tastes were not terribly well-evolved and I found myself slightly off-put but the difference in flavor between the rutabaga and a typical white potato. Without even tasting them anew, I immediately knew that my current adult palate would welcome these atypical root vegetables, such as rutabaga and turnips… especially when I discovered how relatively low they are in carbs. Rutabaga is only 9g/100g and turnips a measely 6g/100g. That’s even better than the 12g/100g in the butternut squash that forms the basis of my newly beloved squ-oodles! Both these vegetables have a similar consistency to butternut squash in that they are more substantial than the flimsier and more likely to spoil zucchini. They are also cheaper and easier to prepare for spiralizing than butternut. They can both be peeled simply like a potato and there are no seeds to carve out. Once my backyard supply of butternut squash runs out, I’ll need a more cost effective alternative to keep me through the winter, and both are worthy candidates.

As follows is my Beef Bolognese, a compilation of my favorite aspects of all the Bolognese recipes I evaluated online. I served it over spiralized rutabaga (rutab-oodles!), but it could certainly be served with any spiralized vegetable or with regular pasta.

Beef Bolognese with rutab-oodles!

Beef Bolognese with rutab-oodles!

SARAH’S BEEF BOLOGNESE

2 tablespoons bacon fat
2 onions
3 cloves chopped garlic
2 stalks celery
1 (28 ounce) can chopped tomatoes
1 (6oz) can tomato paste
1 cup beef stock or one boullion cube
1 cup red wine
1 tbsp dried parsley
1 tbsp paprika
1 tsp oregano
1/2 tsp dried thyme
1/2 tsp ground cinnamon
dash ground clove
dash ground nutmeg
2 lb beef, ground or cubed
2 bay leaves
salt and pepper, to taste

Heat bacon fat in a medium-large saucepan, or in the bottom of a crockpot. Add the chopped onion, garlic and celery. Saute until soft.

Add the tomatoes (discard liquid if using a crockpot) and tomato paste. Add the beef stock if using a saucepan, or a beef bouillon cube if using a crockpot. Add the wine and spices up to and including the nutmeg. Process with an immersion blender, if desired, to puree the vegetables into a smooth sauce.

Add the beef cubes after pureeing, and then the bay leaves, salt and pepper. Cover and simmer on low fire (in crockpot, low or high is fine, depending on how soon you want it to be ready; generally 4 hours on high or 8 hours on low) until beef is done. Ground beef simply should be cooked, cubed beef should be done enough to shred easily with a fork.

Serve over pasta or vegetables. Garnish with parmesan cheese.

Chicken & Sausage Jambalaya with Cauliflower “Rice”

I asked my dad this week what he wanted me to make for dinner when I came to visit the coming weekend. He said chicken and rice. I immediately warned him that he would be eating cauliflower “rice,” not real rice. Upon obtaining his consent to my current culinary preoccupation and dietary constraints, I set out to look for yet another recipe to use in transforming cauliflower into low carb rice.

After researching many possibilities, a logical marriage of chicken and rice appeared. Chicken and rice appear to be quite the bosom buddies in Louisiana, and so I set out to devise a Jambalaya with cauliflower “rice”

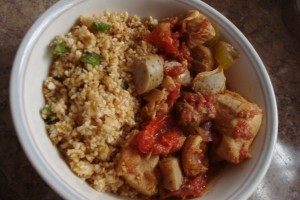
Chicken & Sausage Jambalaya with Cauliflower "Rice"

Chicken & Sausage Jambalaya with Cauliflower “Rice”

SARAH’S JAMBALAYA with CHICKEN, SAUSAGE, & CAULIFLOWER “RICE”

2 tablespoons butter
1 medium onion, chopped
2 cloves garlic, minced
1⁄4 cup celery, chopped
1 (28 oz) can diced or crushed tomatoes in juice
1 (6 oz) can of tomato paste
juice of one lemon
1 boullion cube
1-2 lbs. chicken, cut into cubes
1 bay leaf

one medium head of cauliflower, riced

1 tablespoon chili powder (the mix of spices for making chili)
1 tablespoon cajun spice mix (I use Badia)
1 tablespoon paprika
1 teaspoon dried thyme leaves
1/2 teaspoon oregano
1⁄2 teaspoon cayenne pepper (optional)
1⁄2 teaspoon black pepper
salt, to taste

2 bell peppers chopped
7 oz sausage, chopped

2-3 bunches of green onions, snipped or chopped
1 tablespoon oil
1/2 teaspoon salt

Preheat oven to 350.

Melt the butter in a large skillet or saucepan, or optionally a crockpot on high. When butter is melted, stir in onions, garlic and celery. Saute until softened. Add the tomatoes (if using crockpot, discard juice), tomato paste, lemon juice, boullion cube, chicken and bay leaf. Cover and allow to simmer over low fire.

Rice your cauliflower in batches in a food processor. Fold into a clean kitchen towel and set aside.

Meanwhile, combine spices in a small bowl or ramekin. Add a tablespoon of the final spice mix to the simmering chicken.

Place sausage and peppers in a small casserole dish. Roast in the oven for about 20 minutes until sausage starts to get a little golden brown. Stir up the sausage and pepper mixture at least twice during the roasting to get it done evenly.

Empty cauliflower into a clean bowl. Add oil, salt, green onions and the remainder of the spice mix. Stir well to combine so that spices are evenly distributed.

When chicken reaches desired tenderness, mix in the sausage and peppers. Serve the chicken and sausage mixture over the rice. Enjoy!

Squ-oodles & Cheese

This summer, my dad planted butternut squash with my encouragement (and my placing a pack of seeds in his hand), and it has turned out to be a very rewarding harvest. Butternut squash is typically quite expensive at your average grocery store, and so having a supply in the back yard has excellent financial advantages. It has also lead to the discovery that butternut squash makes a wonderful noodle substitute when put through the Spiralizer.

I first got my Spiralizer last year, and I did use it on a butternut squash once when I had managed to pick one up on sale at Aldi. It worked just as well, of course, but the preparation of the squash as a bit labor-intensive (peeling takes a good while, and then the seeds need to be scraped out like a pumpkin), and since its availability was limited to the occasional grocery store sale, I didn’t spiralize one again. I just stuck to spiralizing zucchini.

But now that I have a quantity of squash from the back yard, I’ve taken to greater experimentation. The preparation of the squash is still a bit annoying what with the peeling and the seeds, but one medium-sized squash yields quite a bit of spiralized noodles. It’s worth the effort in a way that, for me, peeling several potatoes is not. Unlike other types of hard winter squash, the butternut has a lot of flesh in its thick neck; the seeds are only the lower bulb. The neck spiralizes beautifully, and the bulb can be spiralized once the seeds and pulp are all cleaned out, though sometimes it doesn’t work as well because there’s no flesh in the middle to go through the corer to help stabilize the vegetable.

buttnenut-squash-vitamina-lg1I’ve been using spiralized squash so often, that I have taken to calling them “squ-oodles”; I’ve used them in my Pad Thai recipe, I’ve used them in Mornay, I’ve used them with an Italian-style vegetable and tomato sauce. The next logical thing was to attempt a squ-oodle substitution for Macaroni & Cheese.

Of course, I could have made a cheese sauce and simply served it over squ-oodles, but I wanted to try a low carb version of the traditional baked casserole recipe. My main concern here was the thickening of the sauce. In a traditional Mac & Cheese casserole, flour is used for thickening and the macaroni are partially cooked during the baking time. Squ-oodles start out very firm, but will soften up much more quickly than pasta, so the sauce needed to be thick going in. I recalled from my experiences making curry cuisine that sauces including pureed nuts, such as korma, tend to thicken up more quickly than sauces without. I wondered if using nuts instead of flour would help similarly to thicken the sauce. I also decided that substituting cream cheese for part of the milk/cream in the recipe would give it a decided thickness advantage. Indeed, this sauce turned out plenty thick, so I imagine the nut flour or meal was probably unnecessary, but I will leave it in as an option.

DSC02021SARAH’S SQU-OODLES & CHEESE

1 medium butternut squash, spiralized
2 tablespoons butter
2 tablespoons almond flour, almond meal, or crushed nuts (optional)
1 teaspoon minced garlic
1/2 cup light-bodied white wine
4oz of cream cheese
1/2 cup cream or half n half
8 oz sharp cheddar cheese
salt and pepper, to taste
slivered almonds, lightly toasted

Preheat oven to 350. Peel your squash and spiralize the neck. If you want extra leftover squ-oodles, you can also scrape the seeds out of the bulb and spiralize it.

Melt the butter in a medium-small saucepan. If using, add the nut flour, stirring it into the butter to coat. Add the garlic and the white wine and bring to a boil. Allow the wine to simmer until it is reduced by half. Add the cream, cream cheese, cheddar cheese, salt and pepper. Reduce heat to low, cover and allow to melt. When the cheese is mostly melted, process with an immersion blender to smooth out the sauce.

Meanwhile, toast the slivered almonds in an oven-safe bowl. It should take 10 to 15 minutes to get them toasted at 350, but make sure to check every 5 minutes and stir them so that they will get toasted evenly.

Fill a shallow, 9 inch casserole dish with squ-oodles. Place them in the oven dry for about 10 minutes to release a bit of the squash’s natural liquid. Remove casserole of dry squoodles. Stir your cheese sauce into them, just enough to coat. Sprinkle toasted almonds over the top. Bake for 10 to 15 minutes. Baking longer will make the squ-oodles too soft. Serve and enjoy!

Mornay Sauce for Seafood or Pasta

In my general browsing of recipes online, I found myself encountering the term “Mornay,” especially in seafood dishes, such as Crab Mornay or Salmon Mornay. Further research shows that it is — perhaps unsurprisingly — French in origin, a culinary outgrowth of Bechamel sauce, a basic white sauce (butter, flour, milk) that is a core element of French cooking, and that surfaces more widely in recipes of broader Continental origin.

Apparently Mornay is just Bechamel with cheese. The types of cheese used in recipes vary, but the one I seem most commonly is Swiss. I’ve seen it included in recipes to be poured over fish filets, seafood croquettes or crab cakes, even seafood crepes. It doesn’t seem to be used, traditionally, as a sauce for pasta, but its consistency as a cheesy sauce, it seems to me, invites the correlation that Swiss is to Mornay, as Parmesan is to Alfredo, as Cheddar is to Mac & Cheese, etc. Having tried it over pasta, I’m sold! My favorite way to make it, and preserve its longstanding connection to seafood, is to add faux crab and green onions:

DSC01892SARAH’S “CRAB” MORNAY

2 tablespoons butter
1 tablespoon white flour
1/2 cup white wine (optional)
2 cups half & half or cream
8 oz Swiss cheese (Gruyere is most traditional)
2-3 green onions, snipped or sliced
8 oz to 1 lb. faux crab, chunk style, or other seafood
salt & pepper to taste
pasta or bread
parsley

Melt the butter in a medium saucepan. When it is just melted, add the flour and stir until all lumps are broken up. If you’re going to add some wine, make sure it is a light-bodied white so as not to compete with the subtle flavors of the swiss cheese. Heat the wine through and then add the cream and the cheese. I have gathered from looking at several recipes that Gruyere is the variety of Swiss cheese that is considered most traditional, but it can be pretty expensive. Any type of Swiss — or a combination of Swiss cheeses — will do. I use just plain ol’ low-brow brick o’ grocery store Swiss, but don’t rule out a Gruyere or an Emmenthaler or a Jarlsberg as a higher-brow option.

Heat the cream & cheese mixture on medium-low fire in order to soften the cheese. Meanwhile, snip the onions into a bowl and set aside. When the cheese is visibly melting, puree the sauce with an immersion blender to smooth out all the lumps. After the sauce is pureed, add your fish, if you’re using shellfish or faux crab. If you’re making this sauce to top a fish filet, crab cake or seafood croquette, then prepare the fish separately.

Once the sauce is thickened and heated through, add most of the snipped green onions (reserve some for garnish, if you like), salt and pepper. Serve tossed with pasta, over prepared fish and/or with crusty bread. Garnish with parsley.

To be honest, having read a lot of Crab Mornay recipes, I’m not sure what to make of their serving suggestions. Nobody but me seems to have had the idea to serve over pasta. Fair enough. I’ve done pasta but I have also used it (sans faux crab) as a sauce for salmon croquettes. Some of the recipes I’ve read involve serving it over seafood crepes, sometimes with mushrooms added to the crepes or the sauce. Again, seems logical. However, a majority of recipes suggest serving with “crusty bread” or in “a bread bowl.” Are people eating their Crab Mornay like a soup? Or, perhaps, making it thicker for use as a dip (I don’t add as much flour as some recipes because of carbs, but also so it will be pour-able enough to work as a pasta sauce)? I suppose it would be tasty as a fondue, though having larger fish chunks in a fondue seems cumbersome, unless they are also reserved and served on the side for dipping.

The mystery of Mornay will persist, but I’m advocating here and now that we add it to the canon of classic pasta sauces! This simple sauce is quite delicious; cheese lovers rejoice!

Pad Thai Noodles

I’ve made a couple attempts at Pad Thai with different recipes I’ve encountered online. I can’t say previous attempts were failures, but while enjoyable enough, they just didn’t turn out quite right. This time around, I compared and contrasted a few recipes (including the one I had used the last time), and put together a list of ingredients based on what had worked and what hadn’t during my last attempts. I was quite pleased with the result:

DSC01870SARAH’S PAD THAI

8 oz rice noodles
1/2 cup crushed peanuts (or more, to taste)
2 tablespoons oil
2 teaspoons minced garlic
3-5 green onions, snipped or sliced
8 oz or 1 lb. of shellfish, meat, faux crab, tofu, etc.
3 tablespoons lime juice
2 tablespoons fish sauce
1 tablespoon brown sugar
1 teaspoon tamarind concentrate
1 tablespoon sriracha sauce
4-6 eggs
1-2 limes
cilantro

Soak the rice noodles in warm water for about 30 minutes, then drain and rinse in cold water. Set aside.

At the same time, in a small non-stick skillet, toast the crushed peanuts dry on a low heat, stirring every so often.

DSC01867In a large skillet, heat the oil. Snip the roots off the white ends of the green onions. As I’ve mentioned in previous blogs (most recently my recipe for African Peanut Soup), I like to use kitchen scissors for snipping herbs and spring onions. Using scissors will make it very easy to separate the whites from the greens in this recipe. Just snip the onions, starting at the white end, into the saucepan. When you get to the green part of the onions, simply move to a bowl and snip the remainder of the onion to reserve the greens for later.

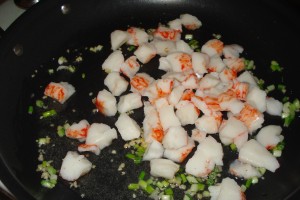
Saute the white snips of the onion with the minced garlic for a minute or two. Add your meat, fish, etc. and saute until cooked. I used an 8oz package of faux crab, chunk style (I don’t like how the flake style falls apart), and so did not have to cook it long, just to heat through.

Meanwhile, in a small bowl, mix together the ingredients for the sauce: lime juice, fish sauce, brown sugar, tamarind and sriracha. Mix until brown sugar is dissolved. Add the drained noodles to the pan; stir fry for a minute or two, then add the sauce. Reduce heat to low.

DSC01868Mix about half of the toasted peanuts in with the noodles. Reserve the other half in a small bowl and set aside. Use the small skillet to fry the eggs (no need to wash first). I like to mix the eggs with a little extra fish sauce before scrambling. I used 6 eggs because I only used 8 oz of fish, but you can use fewer eggs if you’re using a larger amount of meat or fish. I also added a touch of additional vegetable oil to the pan before scrambling. Stir the eggs in with the noodles once they are scrambled.

Once your stir-fry is heated through, garnish with the reserved peanuts and green onions, and fresh cilantro if you have some on hand (I didn’t this last time and it was perfectly tasty without). Quarter your limes and serve with lime wedges to be squeezed over the noodles before eating.

I didn’t have terribly high hopes for this recipe since it is quite a complex dish and it comes from a cuisine tradition that I have otherwise found difficult to reproduce with great authenticity.

I must say, however, I was quite surprised with how this recipe turned out. It looked like Pad Thai I’ve had in restaurants, and it was extremely tasty. I found myself going back for more time and again throughout the day, eating much more of it than I had intended (sorry, diet!). Pad Thai itself varies from restaurant to restaurant, and I haven’t had a restaurant version terribly recently for comparison, but I found this recipe so delicious that I frankly did not care how close it was in authenticity to my favorite restaurants. I suspect I will be making this dish again very soon!

Gorgonzola Cream Sauce

This cream sauce may very well be the most delicious pasta sauce I’ve ever had in my life. Move over alfredo! If you like cheeses with a stronger flavor, this gorgonzola sauce will be right up your alley.

Sarah’s Gorgonzola Cream Sauce

gorgonzola2 tablespoons butter
1/4 teaspoon minced garlic
1/3 cup white wine (optional)
8 oz grumbled gorgonzola (or more to taste)
1 cup half n’ half or cream
ground pepper

Melt the butter in a medium/small saucepan. Add the garlic and saute briefly. This might seem like an exceedingly small amount of garlic, but with the gorgonzola cheese, it can very easily become overpowering and add an unpleasant and unintended saltiness to the flavor of the sauce. After a minute or so, add the white wine. Simmer another minute or so, then add the cream and gorgonzola crumbles. Season with pepper. Heat over low fire to melt the gorgonzola. I like to use my immersion blender to help the melting process along and produce a very smooth sauce, but you can also let the cheese melt only partially if you want a more textured sauce with a few gorgonzola lumps remaining. Serve over pasta al dente.

Two Vindaloos

Of all the Indian curry dishes I have tried, Vindaloo seems to manifest with the most different permutations across Indian restaurants. Other curries that are equally widespread seem to be more standardized. If you order Tikka Masala or Korma or Saag (aka Palak), chances are you will get a curry that looks the way you expect, even if the specific recipe of spices differ from one establishment to the next. With Vindaloo, you don’t know what color it will be, whether it will be creamy or dairy-free… the only constant is the sourness of the vinegar, which of course is what the dish is named for. Recipes I have encountered online and in cookbooks vary just as much, leaving me torn and uncertain about which route to take toward Vindaloo greatness!

I recently tried two very different recipes, both with good results:

Vindaloo #1: A more complex vindaloo

1 1/2 tablespoons cider vinegar
1 tablespoon brown sugar
3 garlic cloves, minced
1 1/2 tablespoons ground ginger
1 tablespoon curry powder
1 tablespoon ground cumin
1/4 teaspoon ground cardamom
1/4 teaspoon ground cloves
1/4 teaspoon ground hot pepper
1 tablespoon mustard seeds
2 tablespoons olive oil
1 cup tomato sauce
1 cup water
1/2 teaspoon ground cinnamon
1 small onion, chopped
3 boneless skinless chicken breasts, cubed (or equivalent amount pork, beef, lamb, etc)
2 tablespoons fresh parsley

images (3)Combine all ingredients in a saucepan or crock pot (use half the water for crock pot). Before adding the the meat, I like to process with my immersion blender to puree, but that’s up to you. The onion and garlic don’t strictly have to be pureed into the sauce, and whole mustard seeds add a nice texture — they won’t be completely pulverized by an immersion blender anyhow. Cook covered on low fire until meat is desired tenderness. If using a crock pot, 4 hours on high or 8 on low should do it. Serve with rice, garnish with parsley.

This Vindaloo turned out quite tasty. In fact, I loved the flavor of this spice combination and can say absolutely nothing against the way it turned out in terms of taste. However, I was less than thrilled with the color. It happens sometimes with recipes that feature the darker spices (cinnamon, cardamom, cloves, etc.) as their dominant characteristic that the color of the curry is affected (e.g. chettinad curry), and such was the case here. This curry ended up a very drab brown color. Most Vindaloo I’ve ever had before is some manner of red or orange color, sometimes a little brighter sometimes a little darker, but usually has a bit of zest to its color. This recipe had none and I was disappointed in that result. Call me crazy, but given the choice, I’d rather have a colorful and flavorful dish!

I remembered a Vindaloo recipe I tried many years ago when I was first experimenting with Indian cuisine. It was a much simpler recipe, but I recalled that it had turned out a nice stark orange. I dug up the recipe last week and gave it a try:

Vindaloo #2: a simpler recipe

DSC018661 medium onion, chopped
1 tsp minced garlic
1/2 cup red wine vinegar
1 tablespoon ground ginger
1 tablespoon ground coriander
1 tablespoon ground cumin
1 tablespoon turmeric
2 teaspoons cayenne pepper or paprika
1lb. chicken, beef or lamb cubes
1/2 cup to 1 cup water
cilantro leaves, optional

Combine onion, ginger, garlic, vinegar, and spices in a saucepan or crock pot. Process with an immersion blender, adding water until the sauce is the consistency of a thick gravy. Stew the meat for a few hours on low heat until desired doneness, or slow cook for 4 hours on high, 8 on low. Serve with rice, garnish with cilantro.

This recipe is much simpler. The flavor is very good; the larger amount vinegar gives added tanginess. The color is it nice bright orange! However, I missed the more complex flavors of the first recipe.

For now, I am posting both of these recipes for preservation; they are both worthwhile and make for a great meal. I have not, however, given up on discovering or formulating a recipe that represents the best of both worlds.

Thai-style Peanut Sauce

This recipe is amazingly delicious and versatile. It works as a sauce for noodles (hot or cold), a marinade for meat or fish, a slow-cooker sauce or as a base for vegetables and meat in a thai-style curry over rice.

SARAH’S THAI-STYLE PEANUT SAUCE

1/2 cup creamy peanut butter
1 (14oz) can coconut milk
2 tablespoons lime juice
2 tablespoons soy sauce
1 tablespoon brown sugar
2 teaspoons ground ginger
1 teaspoon minced garlic
dash of cayenne pepper (or to taste)

images_Coconut_Lime_Ver_4bc68778a6e3d1Combine the above ingredients in a bowl or saucepan or crock pot. I like to use an immersion blender to integrate the peanut butter and puree the garlic. Use cold as a sauce for noodles, for dipping or as a marinade. Add meat and/or vegetables to the sauce for slow cooking or heat in a pan for curry or noodles. Garnish with fresh cilantro.

I’ve used this sauce many times before with meat (usually chicken) and vegetables as a curry over rice. This past weekend, I decided to combine it with some faux crab meat (chunk style), put it over noodles and garnish with some green onions.

I ran into a bit of a roadblock with the noodles, however. Having been to two different Thai restaurants in the last few weeks, I noticed that the menus included noodle dishes containing Thai egg noodles. However, when I was out and about at grocery stores this week, I could only find Thai rice noodles. The Thai egg noodles I’ve had in the past — and thus the ones I had in mind — have been relatively wide and flat, not unlike fettuccine. Browsing other types of Asian noodles at these grocery stores, I found nothing to replicate that memory of Thai egg noodles. I couldn’t even find any on Amazon.

I realized, of course, that I could very well make my own noodles. Flour, eggs and a pasta maker were already in my kitchen. I’m always reluctant to make my own noodles, however, because of the cleanup. Making dough, be it water- or egg-based, is always easy in the food processor, but the extra flour required to ease the dough’s path through the pasta maker gets EVERYWHERE. It’s one thing to clean up my workspace, but to have to clean the floors and every stray little item nearby with a light dusting from clouds of flour doesn’t seem worth the effort.

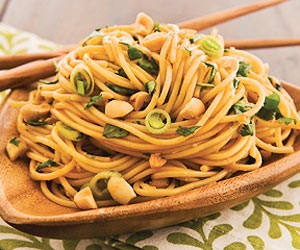
thai-peanut-noodles-11900012rca-ssAfter hitting my last dead-end with the search for something that could pass as a Thai egg noodle, I promised myself that if I felt ambitious enough the next day, I would make my own noodles, but if not, I would simply use the angel-hair-like Chinese egg noodles already in my cupboard.

I was up early the next day without much else to do, so I decided to attempt the noodles. The idea struck me that if I could make the dough just dry enough, I might not need to add extra flour and make a mess. I started with a cup of flour, added a couple eggs, added a bit more flour, etc. until I got a food processor full of fine, powdery dough that formed a somewhat tacky ball when I grabbed a handful and worked it with my hands.

Here is the recipe/method I came up with:

SARAH’S EASY EGG NOODLE DOUGH

2 cups flour (plus at least 1/4 cup in reserve)
3 eggs

Combine the flour and eggs in the food processor. If your eggs are large, you may want to start with two, and reserve the third. The result should be a mealy or powdery substance that will form a ball of dry-ish dough when kneaded in batches. If the dough does not hold together when you try to form a ball, or if it stays somewhat together but cracks, then it is too dry. If the dough won’t even hold together, add your third egg; if it holds together but is too dry to knead without it cracking, try adding a tablespoon of water. If it is too sticky to go through the pasta maker (the pasta maker rollers should be dry without any sticky dough residual after the dough goes through), return the dough to the food processor and add a tablespoon or two of flour. Depending on how large your eggs are, you may need to add more or less flour. Just keep adding it a tablespoon at a time until you get your desired result.

I was able to make a dough with about 2 cups, plus one tablespoon flour, and 3 medium eggs that needed no additional flour for the pasta maker. The process created a few dough crumbles, but they were much easier to clean from my workspace, counter and floor, than a ubiquitous dusting of flour.

Eggplant Lasagna (i.e. Noodle-less Lasagna)

There are a lot of recipes for low-carb lasagna out there. Most of them involve doing something labor-intensive to slices of eggplant or zucchini. Sure, a breaded and fried eggplant parm can be a wonderful thing, but I’m just looking for a low-carb alternative to lasagna noodles. Armed with a new mandolin slicer, I decided to make a direct substitution of eggplant slices for noodles.

Building from my regular lasagna recipe, I endeavored to make a low carb alternative. Because I was also making meatballs to accompany this dish, I did not put meat in the lasagna. Adding meat to this dish would be as easy as browning a pound of ground meat and mixing it in with the sauce before layering. Also, I didn’t have ricotta on hand, so I substituted goat cheese.

DSC01814SARAH’S EGGPLANT LASAGNA

1 tablespoon butter
1 small onion, chopped
1 teaspoon minced garlic
3-4 plum tomatoes, chopped
1 (6oz) can of tomato paste
6 oz of beer or red wine
salt and pepper, to taste
cayenne pepper, to taste
fresh basil and parsley, to taste
4 oz. goat cheese or ricotta cheese
1 egg
1/4 cup grated Parmesan cheese
1/4 cup sour cream
one medium to large eggplant
1-2 cups shredded mozzerella or Italian cheese blend

Preheat oven to 300. Saute the onions and garlic in the melted butter in a medium saucepan until onions are softened. Add chopped tomatoes, paste, booze, salt, pepper. Cook until tomatoes break down. Add fresh herbs and cook until wilted in the sauce. Process with an immersion blender or in a food processor. Cook the sauce down so it’s thicker than an ordinary pasta sauce. A thicker sauce (i.e. less liquid) is necessary in this recipe to offset the liquid that the eggplant will release as it bakes.

If you want to add one pound ground meat, do so now. I recommend browning the meat first in a separate skillet before adding to the red sauce.

Meanwhile, combine the goat cheese (or ricotta), the egg, the parmesan and the sour cream in a separate bowl. If using goat cheese, a fork or whisk will help break up the cheese. Beat or whisk until as smooth as possible.

Quarter the eggplant lengthwise. Slice thin with a mandolin slicer. Spread a thin layer of sauce on the bottom of a 9×9 square pan. Put down the first layer of eggplant slices. Spread with a layer of cheese mixture and then another layer of sauce. Repeat layering: eggplant (I like to alternate each layer crosswise), cheese, sauce. Finish with a layer of eggplant and sauce.

Bake at 300 for one hour. Add shredded cheese and bake for another 45 minutes. The long and slow baking time helps to get rid of excess liquid without burning the contents of your casserole. If your oven runs hot, you may even want to try 250.

This recipe turned out quite tasty, indeed. The eggplant was soft, but sturdy, like a noodle, and the layers held together quite well. The goat cheese as ricotta substitute worked out quite well and makes me think I’d like to try it in a regular lasagna as well. This recipe also makes me curious to try other vegetables as noodle substitutes, perhaps zucchini or some kind of squash or sweet potato.

Quiche

DSC01469Over the weekend, I found myself planning a brunch menu, and so could not help but be reminded of an old favorite recipe-quiche! Perfect for brunch and very customizable. Of course, a traditional quiche uses a pie crust, but in my experience, the pie crust adds a pretty big extra inconvenience. Not only must it be made and baked first, but the exposed crust must be guarded against getting burnt while the middle of the pie is left uncovered. Unless you have a special pie crust guard, an unwieldy make-shift tin foil guard is necessary. If you’re so intent on a classic pie crust that you’re willing to deal with the annoyance, go right ahead-I recommend buying a pre-made pie shell at the store and preparing it according to package directions. But given my family’s preference toward low carb, I have every reason to eschew the inconvenience of the pie crust and make a crust-less quiche.

My favorite sort of quiche to make is with bacon, but over the weekend I made a vegetarian quiche with spinach. In the past I have combined bacon and spinach, and truly, any combination of vegetables and/or protein would work in this recipe.

SARAH’S QUICHE

butter & almond meal
4 eggs beaten
1 cup light cream or half n half
1/2 cup sour cream
3 or more green onions, chopped or snipped
1 teaspoon paprika
salt and pepper
dash of nutmeg
1/3 lb chopped crisp bacon, or 10oz spinach, or other meat, fish or vegetable
1 1/2 cup shredded swiss or other cheese
1 tablespoon flour

DSC01464Pre-heat oven to 325. Prepare a 9 to 10-inch shallow casserole pan by greasing it with butter and then coat with the almond meal. In the absence of almond meal, breadcrumbs could be used, but that would predictably make the dish a bit higher in carbs.

In a medium bowl combine eggs, cream, onions and spices. Add meat and/or vegetables. In a small bowl or plastic bag, toss the flour with the shredded cheese. Add to the rest of the quiche ingredients.

Pour the quiche contents into the prepared pan. Bake at 325 for at least 45 minutes. Test done-ness by inserting a butter knife in the center. If it comes out clean, it’s done. Otherwise bake for longer, and test every 5 minutes or so.