Thai Red Curry Cauliflower “Rice”

I was planning to try a new green curry recipe last weekend, and I also happened to have some leftover pumpkin curry in the freezer, so a Thai feast seemed in the works. It occurred to me a rice dish was a logical addition (and, of course, for me this means cauliflower “rice”), and so I took to the Internet to research a flavorful rice dish that is uniquely Thai.

Now, cauliflower rice can be eaten plainly. The simplest preparation is riced cauliflower with some oil, salt and pepper. That’s as close as I would recommend getting to “plain” cauliflower rice. In my humblest opinion, it needs a bit more seasoning to stand on its own as a dish, and so I look for rice dishes that are complex and flavorful when I’m looking to convert a recipe to cauliflower rice. I’ve already done a few cauliflower rice recipes that complement Thai food well, such as Coconut Rice and Cilantro Lime Rice, but I wanted something more intricate this time, something that could stand on its own. I figured, my favorite Thai restaurant has all kinds of entree rice dishes, surely I could find a recipe for something like that to fit the bill

I’ve also found that cooking the cauliflower rice directly (i.e. as part of the dish preparation; warming is okay) is less than ideal, as the rice loses its texture easily and releases extra liquid into the dish. Many of the recipes I found were for fried rice; many did not seem all that much different from Chinese fried rice recipes-maybe one or two extra “Thai” ingredients. They were uninspiring, and they of course involved cooking the rice by frying it. Since I already keep a lot of integral Thai food ingredients in my cupboards (e.g. curry pastes and powders, sriracha, fish sauce, lime juice, peanuts, etc.) I decided to put together a recipe based on Thai dishes and flavor combinations I’ve enjoyed in the past.

DSC02401SARAH’S THAI RED CURRY RICE

8 cups cauliflower rice
2 tablespoons red curry paste
1/2 cup coconut cream
1/8 cup lime juice
1/8 cup soy sauce
1 tablespoon peanut butter
1/3 cup peanuts, crushed
1/3 cup unsweetened coconut flakes or powder
2 roma tomatoes, diced
1 teaspoon salt
green onions

Rice your cauliflower. Fold into a clean kitchen towel and set aside.

In a compact but tall container (I used the plastic measuring vessel that came with my immersion blender), combine curry paste, coconut cream, lime juice, soy sauce and peanut butter. Mix thoroughly into a sauce (I used my immersion blender to do so; works well to overcome the tackiness of the peanut butter).

Meanwhile crush and toast the peanuts in a dry, non-stick skillet. Once the peanuts are lightly toasted, add the coconut (it will toast faster) and stir until coconut is golden brown. Remove from heat.

In a large bowl, combine cauliflower rice, diced tomatoes, salt and green onions. Add the toasted peanuts and coconut. Once all those ingredients are well-distributed throughout the rice, add the peanut sauce and combine. Serve with your favorite Thai curries.

Note that the peanut sauce in this recipe is intended to coat the rice lightly with flavor, not to be a thick sauce to saturate it. The overall texture is a “dry” rice, rather than a soupy or saucy dish.

I was quite pleased with this recipe. And excellent complement to the curries I was making to eat alongside it. Can’t wait to have the leftovers later this week!

Bell Pepper Pizzas

Some low-carb substitutions are easier than others, and one of the most difficult is pizza. One option is a lower-carb baking mix to make the pizza’s crust, but any baking mix is going to have a significant enough carb count, even if it is lower than average. The Internet is teeming with recipes for cauliflower-based pizza crust, but those tend to be very labor-intensive, requiring cheesecloth to squeeze the cauliflower dry before the crust can even be assembled. That’s just too much fuss for my taste.

I prefer a more elegant low-carb solution, and the cauliflower crust seems forced. More up-my-alley are the suggestions to use a whole food, already somewhat pizza-sized and -shaped, as a base for a personal pizza. Portobello mushrooms, for instance, or a thick slice of eggplant. The one, however, that most caught my interest was the prospect of using bell peppers. The idea behind bell pepper pizzas is, essentially, to combine the logic of a stuffed pepper recipe with that of a personal pizza.

DSC02328SARAH’S BELL PEPPER PIZZAS

3 bell peppers
3/4 cup mozzarella cheese, shredded
1/3 cup pizza sauce or spaghetti sauce
1-2 roma tomatoes, sliced thin
pepperoni or other topping
6 provolone slices

Preheat oven to 400. Cut the bell peppers in half; remove stems and seeds. Line a large casserole pan with tin foil or parchment paper. Arrange the bell pepper halves, insides up, in the casserole pan.

Sprinkle the shredded mozzarella over each bell pepper half. Roast at 400 until the cheese is golden brown, about 20-30 minutes. Remove from the oven and allow to cool some.

Put one or two tablespoons of red sauce in each pepper. Add roma slices. If using a topping, such as pepperoni, put some inside the pepper and reserve some for on top. Cover each pepper with a round slice of provolone. Add toppings on the provolone.

Bake in the oven for another 20 to 30 minutes until the cheese is melted and a bit golden brown. Serve and enjoy!

These turned out quite well. Since roasted red peppers are one of my favorite pizza toppings, it should come as no surprise, I suppose. The bell peppers created a great base for the pizza in terms of size and shape, added an excellent complementary flavor without adding significant carbs. Much recommended!

Pork Lo Mein with Turn-oodles

Of all the non-Western cuisines I have experimented with, the one that has most consistently eluded me is Chinese cuisine. There have been one or two recipes over the years that have worked out okay, but time and time again, my attempts fall flat, leaving me unenthusiastic to try again — especially when cheap take-out is an easy phone call. It’s been a while since I tried a Chinese recipe, though, and on my current low-carb diet, I find myself without the option for Chinese take-out (as many of my favorite dishes are too high carb), and so I am left with little choice but to go without or attempt my own rendition.

I took to the internet to research Lo Mein. The following is my attempt to synthesize all of those recipes I found that looked the most promising.

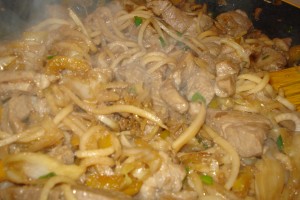
DSC02375SARAH’S PORK LO MEIN with TURN-OODLES

1/4 cup soy sauce
2 tablespoons oyster sauce
1 teaspoon honey
3/4 cup chicken or beef broth
1 Tbs. dry sherry or rice wine
1/2 teaspoon ground ginger
1 lb. pork

2 tablespoon sesame oil
2 lbs. spiralized turnips

2 tablespoons vegetable oil
1 1/2 teaspoons minced garlic
various vegetables, thinly sliced, such as, julienned carrots, shredded cabbage, sliced bell pepper and/or shittake mushrooms
4 green onions, thinly snipped

Combine the soy sauce, oyster sauce, honey, broth, sherry and ginger in a re-sealable container. Cut the pork into strips and marinate in this mixture for at least 30 minutes (I was able to marinate overnight).

Peel and spiralize your turnips. Toss with sesame oil in a large bowl. Set aside.

Heat the vegetable oil in a large skillet. Saute garlic and vegetables (except green onions) until softened. Add the pork strips and marinade. Stir fry until pork is browned. Add the spiral turn-oodles and stir-fry until turnips have softened to a cooked-noodle consistency (you can leave them a little “al dente” or cook them longer for a softer texture, as desired). Garnish with green onions; serve and enjoy!

I was pleasantly surprised with how this recipe turned out. It was less saucy than take-out, but I suspect that’s because I added quite a lot of cabbage. For a saucier version more like take-out, one could either add fewer vegetables and/or turn-oodles, or double the recipe for the marinade. As is, this recipe was still very tasty and “scratched the itch” for Chinese food.

Swedish Meatballs

This recipe is a perennial favorite. So much so, that I was surprised to discover last week when I went to find the recipe that I had never posted it online before. Similar to stroganoff, in that it features meat in a creamy gravy, this dish can be served with rice, noodles or mashed potatoes (or other mashed veggies like turnips, cauliflower, squash, etc.). What sets it apart is the allspice flavor, an excellent and uncommon complement to otherwise familiar ingredients. Traditionally it is also served with a side of lingonberries or lingonberry preserves, but whole berry cranberry sauce works as an easy substitution.

Swedish-Meatballs-450SARAH’S SWEDISH MEATBALLS

1/2 cup breadcrumbs
1/2 cup light cream or half & half
1 tablespoon butter
1 onion, diced
2 teaspoons ground allspice
1 egg, beaten
salt
pepper
2 lbs. ground meat

2 tablespoons butter
2 tablespoons almond flour (or regular flour)
2 cups beef stock
1 cup sour cream
fresh dill or parsley, for garnish (optional)

Hydrate your breadcrumbs in a medium-large bowl by mixing them in with the cream. Allow to hydrate for at least 30 minutes. Fluff with a fork to ensure even hydration. Meanwhile, melt the butter in a saucepan or skillet to saute the onions.

When the onions are softened and the breadcrumbs thoroughly hydrated, combine these two in the bowl with the breadcrumbs. Add the allspice, egg, salt and pepper. Add the meat and mix thoroughly.

Form into meatballs and either brown in a skillet or bake in the oven in a large, shallow casserole dish at 350 until browned (about 20 minutes).

Meanwhile, melt the butter in a saucepan. Add the almond flour, or regular flour. Stir until the flour is thoroughly coated. Add the beef stock and simmer, stirring to make sure the flour is well-combined. Add the sour cream. I like to use an immersion blender to make sure the cream gravy is nice and smooth. Simmer on low and stir often until sauce has thickened.

Add the browned meatballs to the sauce and heat through. Serve garnished with dill or parsley, if desired, and a side of lingonberry preserves or cranberry sauce.

Smoked Gouda Brussels Sprouts

I decided to comb through my old saved recipes on Food.com the other day to see if I could find any forgotten gems. Oftentimes I click save on a recipe with great intention and purpose… and then completely forget about it.

A recipe for smoked gouda brussels sprouts caught my eye. With a few tweaks it was easy enough to turn into low carb version. I did use maple syrup in the version I made, since a teaspoon is quite a small amount, but it only really had a subtle effect the taste, so feel free to omit it if super extra low carb is your goal.

DSC02268SARAH’S SMOKED GOUDA BRUSSELS SPROUTS

1 lb fresh or frozen Brussels sprouts
2 tablespoons butter
3 green onions
1 cup sour cream
1 teaspoon maple syrup or honey (optional)
1 teaspoon paprika
salt and pepper, to taste
4 oz smoked gouda cheese, shredded
1⁄4 cup ground almonds

Preheat the oven to 375. Place the Brussels sprouts and butter in a medium casserole dish. Snip or chop the whites and pale green parts of the onions (reserve the greens for other use) and add them to the dish. Roast the sprouts, stirring a few times, until golden brown, about 10 to 15 minutes.

Meanwhile, shred the cheese. When the sprouts are adequately roasted, remove casserole dish from the oven. Stir in to the roasted sprouts the sour cream, maple, paprika, salt, pepper and shredded cheese. Sprinkle ground almonds on top to cover. Return to oven and bake until almonds are golden brown, about 15-20 minutes. Serve and enjoy!

Crockpot Coq au Vin

Coq Au Vin is one of those cooking preparations I’ve randomly heard about over the years but didn’t really pay much attention to — I suppose it just always sounded like a dish best left to French restaurants. It entered my radar late last year when I had a fondue version of coq au vin at a restaurant, and so when I stumbled upon a crockpot version of this preparation a few weeks ago, it piqued my interest.

A bit of research indicates that Coq Au Vin is essentially poultry braised with wine. Cooking anything in wine seems like a great idea to me; I usually find myself inventing ways to add wine to recipes that don’t call for it. Braising, as it turns out, indicates that the meat should be pan seared before slow cooking in liquid, so the recipe does sound ideal for the crock pot. Apparently this cooking method was developed specifically for tougher, less expensive (right up my alley!) cuts of meat, to break down the tissues, making them more palatable. Also inherent in the braising approach is the purposing of the braising juices as a gravy. Everyone knows I adore mashed things with gravy, and so it seemed the perfect opportunity to try a promising new recipe while at the same time pouring it over a nice root vegetable mash on a crisp October day.

Coq Au Vin with Mashed Rutabaga

Coq Au Vin with Mashed Rutabaga

SARAH’S CROCKPOT COQ AU VIN

6 oz sliced bacon, chopped
2 lbs chicken tenderloins
1 onion, chopped
1 cup dry red wine
3 teaspoons garlic, minced
1/2 teaspoon dry rosemary, or 3 sprigs fresh
1 teaspoon salt
1⁄2 lb mushrooms
1⁄8 cup water (optional)
1 teaspoon cornstarch (optional)
2 green onions, chopped

Chop up bacon and fry until crisp (I like to use my kitchen scissors to cut the raw bacon into pieces before frying). With a slotted spoon, remove the bacon from the skillet and place in the crockpot.

Reheat the bacon fat and brown the tenderloins. Remove the chicken to the crockpot once seared. Add the onions to the remaining bacon fat. Saute briefly, until onions soften. Add wine to the skillet. Scrape down the sides of the skillet and then pour the contents into the crockpot.

Add the garlic, rosemary and salt. Slow cook on high for 3 hours or low for 6 hours. Add the mushrooms about halfway through.

When your coq au vin is finished cooking, you can, optionally, turn the juice into a thicker gravy: mix cornstarch with the 1/8 cup water in a small bowl. Strain the crockpot cooking juices into a saucepan. Heat, slowly stirring in the cornstarch. Stirring often, cook until reduced and thickened.

Garnish with the green onions. Serve with a mashed root vegetable.

This recipe is admittedly not the simplest of crockpot recipes. There is a lot going on stovetop, as well. I didn’t opt to use the cornstarch for thickening, both to keep the carbs as low as possible and because I didn’t want to do one more transfer to a new pan. It worked out just as well treating the crockpot juices as more of an “au jus” gravy. There was not a ton of liquid leftover anyway, so I would say folks can certainly feel free to skip this step.

Italian-style Meatballs

It’s hard to go wrong with Italian meatballs. While not a difficult recipe to pull off with some success, there are some subtleties that can make a big difference in your result.

DSC02333SARAH’S ITALIAN-STYLE MEATBALLS

1/3 cup breadcrumbs
1/3 cup milk
1 large egg, slightly beaten
1/2 cup grated parmesan cheese
2 teaspoons minced garlic
1 teaspoon fresh ground black pepper
1/4 teaspoon dried oregano (optional, or to taste)
A few sprigs fresh parsley, snipped
2 lbs. ground meat
1 (24 oz) can tomato-based spaghetti sauce

Soak the breadcrumbs in the milk for at least 30 minutes. Do not skip this step. Well-soaked breadcrumbs will make a huge difference in your meatballs.

Mix the remaining ingredients in with the soaked crumbs. Form into meatballs. Brown the meatballs in a skillet. Finish cooking in a large saucepan or crockpot with tomato-based spaghetti sauce.

Autumnal Mash

Week after week, I’ve been making recipe after recipe for cauliflower “rice” in my effort to hone the culinary use of this low-carb substitution. Many of the recipes were refreshing and light-tasting for these last balmy days before the weather changes definitively for the chilly. But as the first weekend of October ushered in a few days of unmistakable BRRRR, I found myself wanting to revert to an ages old favorite… the mash!

Do the mash... the root vegetable mash!

Do the mash… the root vegetable mash!

Of course, my erstwhile love affair with the mash was in the form of mashed potatoes. Back in the olden days of the 80’s and early 90’s, I was an extremely picky eater with a palate that allowed for the true enjoyment of very few foods. The great culinary theme of my formative years was to take A) some manner of very white starch, and add B) some manner of sauce that did not stray far from the color palate of the starch. I didn’t even like tomato-based spaghetti sauce as a kid. I was a true culinary terror! If I could have eaten macaroni and cheese every day for every meal, I would have done so with glee. Grilled cheese sandwiches would have been a welcome part of the rotation, and for an even bigger change of pace… mashed potatoes and gravy! Even into my high school years when my food preferences had begun to eke toward adventurous (that is, adventurous in comparison to what came before), I still looked forward with delight to mashed potato day in the cafeteria. Our high school cafeteria, being capitalistically crafty, offered the option of buying a whole lunch, or buying items a la carte. I can’t remember a single day I got the whole lunch. In fact, most days I went into the snack bar line to get a soft pretzel or little turkey sandwich. But on mashed potato day, I was in the main line, ordering up a bowl of reconstituted potato with as much near-neon yellow gravy as would fit in the bowl without dripping over on my way to my reclusive seat.

One can never go home again, and nothing proves the concept better than attempting to eat Kraft Macaroni and Cheese as an adult, and I imagine cafeteria potato buds and mysterious yellow gravy would be the same. But as my palate has matured, some fundamental favorites have not changed, at least in concept. I still love any meal that includes sauce over starch, it’s just nowadays that sometimes takes the form of Tikka Masala over Basmati. The concept of mashed vegetables is a tricky one, anymore, as conservation of carbs is also an issue in mind. Cauliflower mash is a staple of any low-carb dieter, and it remains probably the lowest carb option when cravings for mash arise. However, I see no need to limit our possibilities in this respect, so this weekend, I did two varieties of mash, one recipe old, and one new.

download (2)SARAH’S MASHED BUTTERNUT SQUASH

1 large or 2 medium butternut squashes
2 tablespoons butter
1 cup cream, sour cream or half & half
salt and pepper

Place the squash whole in a large, shallow casserole. Prick the skin several times with a fork. Roast whole in the oven at 350 until flesh is soft. Allow to cool and then peel off the skin, scoop out the flesh, and discard the seeds.

In a medium-sized, deeper casserole dish, mash the squash with butter, cream, salt and pepper. Since squash can be stringy, I like to whip the mixture with my immersion blender until it is silky smooth.

If the squash mixture is somewhat soupy, place back in the oven, uncovered, to keep warm while letting some of the excess liquid evaporate. Check on the mixture often and stir to check consistency. When it reaches the consistency of mashed potatoes, serve and enjoy!

Again, I can’t stress this enough: squash flesh tends to be stringy when cooked. Butternut less so than other squashes, but you’ll still have strings. I DO NOT recommend a simple treatment with a potato masher (i.e. the method for lumpy-style mash). If you don’t have an immersion blender, try a food processor. It’s a little more work, but worth the effort to get a silky smooth result.

download (3)SARAH’S GARLIC MASHED RUTABAGA

2 lbs. rutabaga
2 tablespoons butter
2 teaspoons garlic, minced
1/2 to 1 cup cream, sour cream or half & half
salt and pepper

Peel the rutabaga and cut into chunks. Place in a large saucepan or stock pot. Cover with water and boil until tender.

Drain the rutabaga chunks and place in a medium, deep casserole dish with butter, garlic, cream, salt and pepper. Mash or process with an immersion blender until smooth. If necessary, place in the oven to keep warm while other dishes are cooking. Serve with your favorite gravy, sauce or curry.

This was the first time I ever mashed a rutabaga. Honestly, it behaved very much like a potato. If anything, it’s a little drier and requires a bit more boiling time. But otherwise it is very potato-like. It did not have excess liquid at the end, like butternut and especially cauliflower mash do. I did use sour cream, instead of liquid cream, but I imagine it wouldn’t be really any different than potatoes if you did use half & half. I used a full cup, but adding half the cream would probably also work out okay because the rutabaga is so close to potato in consistency. I’ve gotten in the habit of adding a goodly amount of cream to any mash, simply because cauliflower mash requires it to get a bit more potato-like body. The rutabaga would not need as much, FYI for those looking to limit fat and/or dairy.

The Great Mchicha Experiment

A few years ago, while browsing — perhaps aimlessly — through the annals of my go-to recipe site, Food.com, and I encountered a dish the likes of which I had never seen before… it purported to be a Tanzanian dish for creamed spinach called Mchicha (forgive my ignorance of Tanzanian cuisine… you know how rife Pittsburgh is with Tanzanian restaurants, right?). Based on the ingredient list, I didn’t see how this dish could be anything but an unmitigated revelation of culinary splendor! Creamed spinach and creamed spinach curries are among my favorite side dishes (a little research reveals that true Mchicha uses Amaranth greens, but local substitutions are often the case in recipe conversation from one continent to the next). Not only does this recipe boast spinach in curry spices, but it is creamed by a combination of coconut milk and peanut butter. How can this recipe possibly be anything but unparalleled deliciousness?
270609-spinachI tried this recipe, shortly after I found it a few years ago, and I was underwhelmed.

How could this recipe have failed so disappointingly? The reviews of this recipe on the website were glowing and enthusiastic. The ingredients combine very many of my favorite flavors. What went so wrong with a recipe that seemed in every way so right?

I was reminded of the poor performance of the Mchicha recipe a few days ago. I decided to peruse my catalog of saved recipes on Food.com, looking for that gem of a recipe I might have saved and forgot about years before. I got a few hits of inspiration from this list, but I also stumbled upon the Mchicha recipe and it served as a stark reminder of the delicious potential that went unrealized. It was a few years back, and so I don’t remember exactly what I did in putting this recipe together, but in mulling over the recipe once more I did zero-in on one particular variable that could have led the recipe astray. The recipe calls for curry powder, even proclaiming one should use one’s favorite blend!

89525044The trouble with curry powder is that there are so many blends of so many origins and so many types. Cooking in modern America with published cookbooks and Internet recipes has given us the expectation that we can cook with exactitude. After all, even little known or exotic ingredients can be researched and ordered by mail from specialty vendors. However, many of my favorite cuisines (you know, the spicy ones) have precisely a tradition of inexact-itude. Contemplating what went wrong with this Mchicha recipe, I couldn’t help by be reminded of the time my Kuwaiti friend showed me a cook-book from back home. It was published with a Western audience in mind, featuring colorful pictures and English translations of each recipe. One unmistakable point of authenticity, however, stood out. Nearly every recipe called for “mixed spices.” My friend explained that every household back home has their own particular spice mix, sort of a “house blend” in the same sense that a particular restaurant might have a “house dressing.” The differences in the blends from one household to the other can sometimes be marked enough, he explained, that conflict may arise in a new marriage over whether to use the mixed spices from bride’s childhood home, or the groom’s. I immediately thought of curry powders and curry pastes and the myriad of different types, not only for different styles or regions, but even within the same type (just try to find consistency in Garam Masalas!). Looking at the Mchicha recipe again this weekend, I understood that line item calling for “curry powder” was in fact a call for whatever local “mixed spices” would have been used.

On the one hand, understanding the Mchicha recipe in this context opens up the recipe with legitimacy to a lot of creative interpretation (worry not, I won’t be using any household “Polish mixed spices”), but it also opens the recipe to a much wider margin of error. I don’t remember what sort of curry powder I used making this recipe the first time, but it very well could have been the discordant ingredient that collapsed this recipe.

downloadApproaching this recipe anew, I realize I could have researched recipes for Tanzanian curry powders. However, perfecting a new spice blend often takes a bit of trial and error, and given one failed attempt already on this recipe’s track record, I didn’t want to risk anything but a tried-and-true blend. Rather, I recalled that since the time when I made this recipe the first time, I have encountered other varieties of African cuisine. In fact, I went on a different culinary adventure a few years back in effort to master my own versions of some Ethiopian recipes. In doing so, I formulated my own recipe for the Ethiopian spice mix, Berbere. Perhaps, I mused, a nearby African curry powder would make this dish work in a way that whatever curry powder I’d used the last time had fallen flat. I have used my Berbere in many Ethiopian dishes, some of them calling for peanut butter, with great success. At the same time, my interest was piqued by the coconut milk as well. I had just ordered some Thai red curry paste in bulk online, and I couldn’t help thinking that the mix of coconut and peanut butter were such an awesome combination in Thai curries, however far away from Tanzania such cuisine might be. The recipe author even included a chipper parenthetical that one could use one’s favorite curry powder or paste! Perhaps a red curry paste was just what this dish needed for deliciousness.

I couldn’t decide; I wanted to try both. I resolved that the only way to salvage this dish from its prior disappointing conclusion was to try both options. I revisited the recipe and determined that I would halve the spinach, but keep the other ingredients as is (to up the flavor ante) and increase the curry powder/paste to make the difference all the more marked. This weekend I prepared two versions of Mchicha, side-by-side, one with Berbere once with Thai red curry paste.

Two Variants of Mchicha, with Berbere and Thai Red Curry Paste

Two Variants of Mchicha, with Berbere and Thai Red Curry Paste

SARAH’S MCHICHA

2 tablespoons ghee or 2 tablespoons butter
1 onion, chopped
1 tomato, chopped
2 tablespoons curry powder (Berbere!) or paste (Thai red curry)
1/2 teaspoon salt
3 tablespoons peanut butter
1 cup coconut cream
1 lb spinach, chopped

Melt the butter or ghee in a wide saucepan or skillet. Add the onions and saute until softened. Add the tomato, the spice mix and the salt. Stir and fry until the spices become fragrant. Add the peanut butter; stir until melted into the other ingredients. Add the coconut and the spinach. Heat over medium-low fire until spinach is cooked and sauce has thickened. Serve as a side dish to your favorite curries!

This time I had two dishes of success! I think I may have slightly preferred the version with Thai red curry paste, but the Berbere version was also delicious, just in a different way. I think that intensifying the other ingredients also helped, as I tend to prefer a bolder flavor palate, and this recipe is relatively sparse on ingredients in general (no garlic, even!).

One recipe note: I highly recommend using chopped spinach. I used Trader Joe’s chopped frozen spinach for convenience, but I think last time I used a different frozen spinach. Some packages of frozen spinach are, in fact, whole leaf, and even if those whole leafs are baby leafs, there is something just slimy and unappealing about a cooked whole leaf of spinach. On the other hand, I don’t think pureeing this dish after cooking would be a great idea either; a large part of its aesthetic appeal, I think, are the different colors in everything remaining separate: green of the spinach, red of the tomato, light peanut-y golden brown of the sauce. Using spinach that was chopped from the outset makes the spinach both integrated enough and still distinct enough that the dish works on many levels.

The Conundrum of Chili Powder vs. Chili Powder

A particular terminology duplication has arisen in modern American cookery, and I’m at a bit of a loss on how to resolve it.

In ordinary USA recipe parlance, “chili powder” has come to denote a particular spice blend. Go to any grocery store, or even most dollar stores, and you will see offered among the spices “chili powder” which is not, for certain, powdered chilis. Perhaps powdered chili pepper might make up one component of the spice mixture, but those chilis are unlikely to be very hot since most mainstream American palates run to the mild side (certainly, mainstream Pittsburgh tastes do). This chili powder is, in fact, a blend of spices intended for Mexican and Tex Mex recipes, popularized and mainstreamed more than anything by recipes for the quintessential Tex Mex stew, itself called Chili.

Chili Peppers

Chili Peppers

I have nothing against spice mixes, certainly. As a hobby cook of some conscientiousness, I do like to make my own spice blends when it is practical to do so, especially when a particular blend is not easy to come by in a form offering consistent quality and/or value. Berbere, the standard spice blend for Ethiopian recipes, as an example, is not readily available in grocery stores, and those that do offer it usually do so at a high price, and purchasing a blend online incurs added expense of shipping and the ever-present risk that one’s favorite retailer will discontinue the specific brand of berbere mixed spices that the chef has come to rely upon throwing all of her tried-and-true Ethiopian-style recipes into flux and chaos… rather than tangle with all these contingencies, I make my own so that every batch of Mesir Wat will be the same as the last.

Other blends produce fewer stumbling blocks and thus fewer qualms on my part with using the pre-mixed grocery store blend. Badia makes a good line of spice mixes, including a turmeric-centered curry powder, cajun seasoning, chili powder, etc. I do have a preferred recipe for making my own chili powder (which I will share below), and my own recipes for various differing styles of curry powder, such as garam masala, which should never be confused with other types of curry powders, such as the turmeric-based powders or the Madras powders, etc. But sometimes, a gal just wants grab a jar of spice mix and measure, without going to the trouble of pre-mixing her own blend. By now, I have a pretty good sense, for the sake of my own tastes, when using my homemade blend makes the difference and when throwing myself on the mercy of a commercial spice company makes little to no difference.

And so, I have no qualms with recipes calling for spice mixes, chili powder among them, as it affords the chef a simple opportunity to choose either a homemade spice blend or a store-bought mix. The problem with “chili powder” is that there is an ingredient by the same name that shows up in recipes: namely chili peppers that are powdered.

Powdered Chili Peppers

Powdered Chili Peppers

I’ve become pretty good over the years at telling which type of “chili powder” a recipe is calling for. A recipe for Indian or Thai curry is probably calling for powdered chili peppers, whereas a Mexican, Spanish, Cajun, mainstream American cuisine recipe, quick & easy recipe, etc. are probably calling for the spice blend. This duplicative term bothers me the most as a recipe author; when I post recipes online containing the spice blend called “chili powder” I always feel that I have to clarify in some way. I more often find myself making recipes with chili powder, rather than powdered chilis, and yet I always feel that I have a responsibility to clarify as the writer of a given recipe.

This sense of responsibility, this commitment to clarity makes me wish to solve this terminology impasse in an easier, more efficient way. I suppose I could use the distinction indicated above, chili powder vs. powdered chilis. But this division would really only work for people who follow my recipes close to enough to know I had pre-established this distinction. The term “chili powder” is so well-established in both meanings out there in the world of recipe writing, that I would still feel the need to clarify every time I included “chili powder” in a recipe. What is the elegant solution here? What can I call “chili powder” to make it clear that I mean the spice mix, and not powdered chilis?

I am open to suggestions!

Component Spices for a Chili Powder Blend

Component Spices for a Chili Powder Blend

SARAH’S FAVORITE CHILI POWDER SPICE BLEND

5 tablespoons paprika
1 tablespoon oregano
3 teaspoons unsweetened cocoa powder
2 teaspoons cumin
1 teaspoon ground coriander
1⁄2 teaspoon cinnamon
1⁄4 teaspoon allspice

Combine all ingredients in a container. Mix well. Use in recipes calling for the spice blend chili powder.