Classic Deviled Eggs

With my mom coming to visit this weekend, and a dozen eggs on the verge of its expiration date, I came to the obvious conclusion that deviled eggs would make a great low-carb snack for both of us.

I quickly realized, however, when I went to refresh my memory on my recipe for plain ol’ regular deviled eggs, that I’ve never posted it online. I’ve posted plenty of crazy fancy deviled egg recipes; I’ve made regular deviled eggs many times in the meantime… but where was that recipe? Did I use one of the fancy recipes and simplify it? Was it in a recipe book I had out from the library? Was off the cuff? From another online source?

I decided to solve this quandary once and for all by researching and composing and authoritative recipe for classic deviled eggs — plus a handy new method I’ve recently discovered for making the eggs!

SARAH’S CLASSIC DEVILED EGGS

6 large hard-boiled eggs (12 large hard-boiled eggs)
1/4 cup mayonnaise (1/2 cup mayonnaise)
2 teaspoons dijon mustard (1 heaping tablespoon dijon)
1 teaspoon lemon juice (2 teaspoons lemon juice)
few dashes of Worchestershire sauce
salt and pepper, to taste
(optional: chives or green onion in the mix, or to garnish)
paprika to garnish

Hard cook your eggs the day before and chill through overnight. Peel shells off. Slice each egg in half lengthwise.

Collect yolks in a heavier (like a zip bag) duty clear plastic storage bag. Holding the yolks through the plastic, break them up dry until finely crumbled.

Add remaining ingredients to the bag: mayo, mustard, lemon juice, Worcestershire, salt and pepper. Again, using the bag, combined the ingredients together until smooth by massaging or kneading through the bag. Press the yolk mixture into one corner using two fingers in a scissor action or by smoothing along a hard surface (think like trying to get all the contents out of a toothpaste tube). Once the ingredients are thoroughly mixed and mixture is smooth, cut a small hole in one corner of the bag and use as a pastry bag it to fill the egg halves, squeezing the contents out through the hole.

Chill. Garnish with paprika and serve.

Italian-style Meatballs

It’s hard to go wrong with Italian meatballs. While not a difficult recipe to pull off with some success, there are some subtleties that can make a big difference in your result.

DSC02333SARAH’S ITALIAN-STYLE MEATBALLS

1/3 cup breadcrumbs
1/3 cup milk
1 large egg, slightly beaten
1/2 cup grated parmesan cheese
2 teaspoons minced garlic
1 teaspoon fresh ground black pepper
1/4 teaspoon dried oregano (optional, or to taste)
A few sprigs fresh parsley, snipped
2 lbs. ground meat
1 (24 oz) can tomato-based spaghetti sauce

Soak the breadcrumbs in the milk for at least 30 minutes. Do not skip this step. Well-soaked breadcrumbs will make a huge difference in your meatballs.

Mix the remaining ingredients in with the soaked crumbs. Form into meatballs. Brown the meatballs in a skillet. Finish cooking in a large saucepan or crockpot with tomato-based spaghetti sauce.

Hummus Mastery

I’ve blogged basic hummus recipes before, and while I was never displeased with my hummus creations, I never stopped experimenting with this fundamental recipe. My primary goal in working on this recipe was to create a smoother hummus. Word on the street was that using dried garbanzos, as opposed to canned, would yield a smooth result. I did not find this to be true, but I did find that getting the proportions right with dried beans and balancing it all with the rehydration process was just not worth the trouble. The results I got weren’t especially smooth and the quality was spotty. I eventually scrapped the notion of using dried beans.

All this trial and error resulted in much extra hummus being produced, so I ended up bringing my experiments to work to unload on my co-workers. One of my co-workers at the time, Scott, is a vegan, but also a former employee at Aladdin’s Eatery, a Middle Eastern chain restaurant in our area. As chains go it is actually quite good due to their emphasis on natural foods and ingredients, and I have long admired their hummus and baba. What Scott revealed to me about the way they make hummus was positively shocking… they don’t use garlic. He told me that garlic is in fact not a standard ingredient in traditional hummus. Every recipe for hummus I have seem in my life uses garlic; how garlic weaseled its way into the standard ingredient list, I do not know. It’s not that hummus is bad with garlic. It can be quite tasty. But what I discovered following Scott’s revelation is that hummus can be even better without!

healthy-hummus-recipesSARAH’S MASTERFUL HUMMUS

1 (15oz) can of Trader Joe’s Garbanzo Beans, rinsed and drained
3 tablespoons sesame tahini
1/3 cup olive oil
juice of one or two lemons
1/2 teaspoon salt
dash of cumin
1/4 cup water
paprika, for garnish

Combine the garbanzos, tahini and oil in the food processor. Juice the lemons, making sure to strain out the seeds. Add lemon juice, salt and cumin to the processor. I usually use 1/4 cup of water, but you may want to use more or less, depending on the consistency you want. If you like a thicker hummus, add less. I recommend adding water one tablespoon at a time while processing to find out how much you need to reach your desired consistency. Adding more liquid will also enable the food processor to make the hummus smoother. Serve with chips or pita bread, garnish with paprika and drizzled olive oil.

I have tweaked this recipe many times, and have done side-by-side comparisons with Aladdin’s hummus (I make a batch for comparison whenever I get Aladdin’s take-out). Over this past weekend I did the same, and it’s finally gotten to the point where they are nearly indistinguishable. Any subtle difference in flavor is probably due to differing source ingredients (I’m sure I don’t use the exact same tahini brand as they do, for example), but the general balance of flavors is the same.

If you don’t have a Trader Joe’s nearby, you can, of course, use another brand of garbanzos, but I would recommend using them if you have a TJ in town. I discovered that Trader Joe’s garbanzos are significantly better tasting than other brands of canned beans after using them in my Garbanzo Salad. They are the only garbanzos I will use, now, for the salad, and they make a big flavor difference in the hummus, too.

One final note about the lemons: I usually double this recipe and use three lemons, so technically, I use one and a half lemons for a recipe of this size, but the flexibility to go up or down in lemon flavor is up to you!

Fresh Salsa

My dad suggested a few weeks ago that we try to make salsa from the vegetables in his garden. I easily got on board with this idea, but had to break it to him that we would need more than his garden offers. Luckily, though, his plentiful tomatoes offered an excellent base for a fundamental salsa recipe.

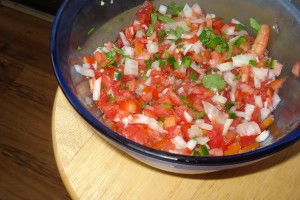
SalsaI had never made fresh salsa, per se, but I did have some starting expertise from two sources. First, I’ve made a good bit of guacamole in my day, and the ingredients are similar (sans avocado, of course). Second, my friend and chef mentor of yesteryear, Lisa, used to make salsa and advised me on the key to her approach-namely, that vegetables should be diced small in a careful and deliberate way, not pulverized in a food processor. I never attempted salsa back in my college days, but I remembered her advice and remembered the very particular and positive effect it had on her salsa recipe.

SARAH’S FRESH SALSA

2-3 lbs. medium tomatoes, just ripe (flesh should be firm, not grainy)
1 large onion, or several green onions, snipped
1 teaspoon minced garlic
1 jalapenos, or other hot pepper to taste (optional)
juice of 1 lime (about 2 tablespoons of juice)
cilantro, several sprigs, to taste
salt and pepper, to taste

Quarter the tomatoes, seed them, rinse clean and then place on a paper towels to dry a bit.

Meanwhile, dice the vegetables. All vegetables should be chopped into small pieces, but not so small that they lose their shape (as would happen if pulverized in a food processor). This process isn’t as labor intensive as you might think. Onions can be sliced first to create rings, and then cut into tiny cubes against the grain of its natural layers. Or, if using green onions, they can easily be snipped fine with kitchen scissors. Slice peppers in half length-wise, seed them, and then cut long, slender strips; make small cuts in the opposite direction to achieve a small dice. Once tomatoes have dried a bit, do the same.

Combine diced onion, minced garlic, chopped jalapenos, and chopped tomatoes in a medium bowl. Juice the lime over the bowl. Snip the cilantro into the mix, and season to taste with salt and pepper. Let stand in the refrigerator at least a half hour. I usually try to make it a day ahead of time to let the flavors meld together. Serve with chips or tacos or any dish to which salsa is a good compliment.

Blue Mushroom Soup

Sabrina, Ted and I recently attended the 2013 Taste of Ellicottville festival, and after sampling many delights, one of our favorites was the Blue Mushroom soup. Here is my attempt to recreate it:

SARAH’S BLUE MUSHROOM SOUP

1/3 pound of bacon chopped
1 onion, diced
1/2 teaspoon minced garlic
2 tablespoons butter
2 tablespoons flour
1/2 white wine
2 cups broth (beef, chicken or vegetable)
salt and pepper to taste
8 oz wild mushrooms (i.e. crimini, portabella, etc), sliced
2 cups cream or sour cream
5-8 oz blue cheese

Fry the bacon in the bottom of a large saucepan until crisp. Add the onions and garlic, fry until softened. Add the butter, stir until melted. Add the flour and stir until combined. Add the wine, broth and heat through. At the seasoning and mushrooms, and simmer over low heat about ten minutes, until mushrooms are tender. Add cream and blue cheese and heat through, or until cheese is melted, keeping at a low temperature so that the cream does not boil.

Serve and enjoy!

Adventures in Breading: Legendary Fried Zucchini from Country Fried Chicken

To say that I was a picky eater growing up is a vast understatement. Ask my parents, and they will easily bemoan the days when they struggled to get anything substantially more nutritious than macaroni and cheese past my lips. In those days, I didn’t enjoy food so much as tolerate it because Neilbert and Saundra told me that I needed it to live (medical science and insistent hunger substantiate said claims). Now, food is my foremost hobby and my palate so adventurous that my parents are afraid of the majority of my favorite cuisines.

But back in those days, when dairy-covered starch was the only cuisine I could claim to “like,” imagine my parents’ astonishment when I encountered fried zucchini out at a restaurant and loved it! Pleased and in awe that I raved about eating a vegetable, Saundra naturally hoped to replicate this experience at home. My mother has always favored baking over cooking, but she stepped outside of her culinary wheelhouse to make me fried zucchini.

Alas, it just wasn’t the same. At the time, it proved to be a dead-end conundrum. She had, after all, taken zucchini, breaded it and fried it. What else was there possibly to be done?

As I grew older, and my palate more adventurous, my creative nature logically ventured into the kitchen. I stayed away from breading and frying for most of my adult life because, well, conventional wisdom at the time was to avoid fat in one’s diet as much as possible (oh the 90’s!). Then, two things happened more or less around the same time to change that philosophy.

Saundra was diagnosed with type II diabetes, and as a family we experienced the revelation that fat was not our enemy, but in fact, an ally against carbohydrates. Switching to a low carb diet helped Saundra control her blood sugar, and cutting down on carbs virtually eliminated in me a tendency toward fainting that has plagued both Saundra and myself for most of our lives.

Around this same time, my then-S.O. and present-though far-flung-friend Geoff introduced me to his family recipe for wiener schnitzel. He and his mother fundamentally taught me how to bread and fry, and I have expanded these skills to chicken parmesan, breaded cauliflower, etc. This is the type of breading that Italian American chefs have described to me as “FEB”: dredge in flour, then in eggs, and finally in breadcrumbs. Besides the FEB breading, I also ventured into pakora-style appetizers using a simple garbanzo-flour breading. Tasty, great, fried foods are the new health food.

But, I still had never encountered the solution to my zucchini mystery. Even in building my own aptitude with breading, the fabled fried zucchini of my youth remained a mystery.

About two years ago, I dated a guy who didn’t eat pork for reasons of heritage, and consequently, habit. Otherwise, he was an enthusiastic meat eater, and so I mused over the concept of making wiener schnitzel with beef instead of pork. After all, I knew it could be done with chicken, and most traditionally with veal… but I’m poor, and veal is mean, and if it would work with beef, all the better. The train of thought, and train of internet searching, that led me to consider frying beef inevitably produced recipes for country fried steak. Further searches revealed that country fried steak was connected to the very fundaments of country fried chicken. What was this “country fried” phenomenon? And how did it differ from the FEB breading that had become commonplace in my kitchen?

According to the recipes I consulted, “country-fried” breading simply eliminates the breadcrumbs. It is, essentially, “FEF,” if you will. Dredge in flour, dredge in eggs, and finish off with more flour. The flour can also be augmented with herbs and spices… take a page from KFC, right?

Eventually time and ambition inspired me to try this concept on chicken (I remain dubious about the concept of breading and frying steak… eating beef that is anything but rare or over-stewed to the point of falling apart makes me uncomfortable). When the chicken hit the flour a second time, I had a revelation. The eggs and the flour and the clumping… this what the zucchini breading! This was the fluffy batter that the fabled zucchini had all those years ago!

Country-fried chicken has become a staple of my diet, now. I even prefer it to FEB-style chicken in Italian meals. It’s great in tacos, and even pretty awesome with spicy dipping sauces like sweet & hot mustard or thai peanut satay. It is essentially the all-purpose chicken tenderloin! And there is nothing to it, just to bread the chicken in flour, then eggs (beaten with a bit of milk or cream), then flour. I usually do a double breading, so flour, eggs, flour, eggs and finally flour.

With my country-fried chicken mastered, I picked up a zucchini and put my FEF to the ultimate test. The result was the fried zucchini of legend that I ate one random time as a child. Couldn’t be easier. Here’s how to do it.

SARAH’S LEGENDARY FRIED ZUCCHINI

You will need:

zucchini
flour
eggs
milk or cream
salt
Parmesan and marinara sauce (optional

Using a mandolin-style slicer, cut the zucchini into thin planks. In the alternative, use a french fry cutter to make zucchini fries. Prepare the breading: mix a little salt in with the flour, set out on a plate. Beat the eggs with a little milk or cream, as well as some salt, set out in a wide bowl. Dredge zucchini slices or fries in the flour, then the egg mixture, back in the flour, back in the egg, and finally finish with flour. Heat oil in a non-stick saucepan. Fry the zucchini strips until lightly golden. Serve with parmesan and marinara sauce, if desired.

Sun-dried Tomato & Artichoke Dip

I recently recalled one of my favorite dip recipes from years gone by when search for recipes I hadn’t made in awhile. I originally received a version of this recipe from home chef extraordinaire, Lisa Di, who served it at all of her cocktail parties and picnics back in my college days.

Alas, but my scribbled paper copy the recipe I took down directly from Lisa is necessarily lost to time, but I found a very similar version on food.com. After a few tweaks to ingredients and method, here is my recipe, heartily reminiscent of those old days:

SARAH’S SUN-DRIED TOMATO & ARTICHOKE DIP

1/2 cup sour cream
1/3 cup mayonnaise
4 oz. cream cheese
1 (8 oz) brick of white cheddar (or swiss or parmesan or other white cheese)
1/2 cup sun-dried tomatoes
1 (14 ounce) can artichoke hearts, drained
1 1/2 teaspoons minced garlic
a dash, or more, of ground red pepper

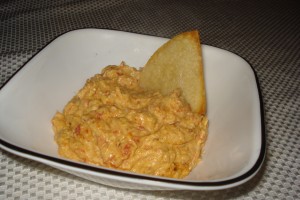
If you have an immersion blender, you can use my lazy method for making this dip. Otherwise, chop up or shred (i.e. the cheese) the whole ingredients ahead of time. If you do have an immersion blender then simply combine all ingredients in a medium casserole dish. Heat in the oven at 350 for 5-10 minutes, or until the cheese softens and begins to melt. Pulsing your immersion blender, chop up the amalgam of ingredients as desired. I prefer to have a little texture to this dip, so I don’t process it smooth, only until the artichokes and tomatoes are chopped a bit and well combined. Serve with chips or crackers.

Sweet Potato Kofta with Mango Raita

Sometimes I set out in search of one particular type of recipe, but sometimes a recipe finds me instead. While on the hunt for something else, I stumbled upon this recipe and said, “Well, heck, I’ve got to book mark this one.” It very quickly thereafter made it onto my shopping list for a lazy Sunday of recipe experimentation:

SWEET POTATO KOFTA

1 (40 oz) can medium sweet potatoes, rinsed thoroughly
1/2 cup dry red lentils, cooked
1/4 cup minced dates
1/4 cup shredded coconut, toasted
2 tablespoons minced garlic
2 tablespoons ground ginger
1 jalapeno pepper, minced
1 teaspoon ground cumin
1/2 teaspoon toasted sesame seeds
2 tablespoons cilantro chutney
salt and pepper to taste
2 tablespoons cornstarch, optional
1/2 teaspoon baking powder
extra water, or an egg

MANGO RAITA (all ingredients to taste)

mango chutney
lime juice and/or zest
plain yogurt or sour cream
salt
black mustard seeds

Unless I need sweet potatoes (which are functionally the same thing as yams) to retain their shape (e.g. as fries or in cubes), I use canned because they are so cheap, easily available, and pretty much ready to use right out of the can. Problem is, they are often stored in syrup. Just make sure you rinse the potatoes very thoroughly to get all the extra sugar off.

Preheat oven to 400. Prepare all ingredients as indicated in the recipe list and then combine in a large bowl. I used electric egg beaters and they worked well for pulverizing the potatoes without pureeing the other ingredients. Add a little water, or an egg, if ingredients seem too dry. Form into roughly golf-ball sized kofta and arrange on a non-stick baking sheet. Bake until golden brown (check after about 20 minutes).

Meanwhile, prepare the mango raita by combining all the ingredients in desired proportions. If you’ve never made raita or don’t know what it is, the yogurt or sour cream is the primary ingredient of this condiment, the fruit or vegetable (in this case, mango chutney is used for ease of preparation), should be a secondary amount, and then more lightly on the seasonings to taste. I like a little runnier raita so that it’s good as a dip, but don’t add so much lime juice it gets too liquid-y.

One additional innovation I made with this recipe… the weekend after I made them, I decided to try some modifications to my pakora recipe, and ended up with a lot of pakora batter, so I battered and fried the leftover koftas. Definitely tasty either way.

Vegetable Pakora

Pakora VegetablesI’ve been meaning to try making a Pakora recipe for quite some time, but seeing that fried appetizers always call for a bit more work than the average recipe (and come with a much smaller margin for error) it took me some time to work up the ambition to give them a try.

It was also a matter of occasion and audience. To make a more-ambitious-than-usual recipe happen, I need time to do it with the necessary ingredients on hand. It’s also helpful to have someone to make it for. I can, and do, often enjoy cooking for myself, but that little extra motivation of social cooking is sometimes what I need to talk myself into those more ambitious recipes.

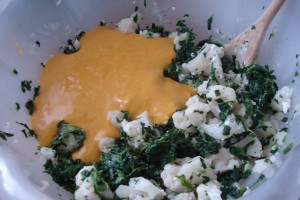
Ordinarily, my parents are a terrible audience for so-called “ethnic” food. They tend to be wary of dishes that stray too far from the ingredients and seasonings they grew up with. Lo and behold, though, my mother’s research into natural health and homeopathic treatments has led to the revelation that *shock* some of these “exotic” spices have unexpected health benefits. Batter in vegetablesHaving discovered that turmeric, and more recently ginger, are potentially beneficial to some of her specific ailments, my mother had taken sometimes to eating these spices dry on her finger, just to get a little in her system, not knowing what else to put it in. This method was ultimately far from pleasant. My challenge then became to show my mother that there are tasty recipes containing at least one, if not both, of these spices, while at the same time not sending her running from the dinner table at the sight and smell of a pungent, spice-rich curry. To keep my parents’ skepticism from rising as they saw and scented peculiar goings-on in the kitchen, I had to assure them that I was using no ingredients beyond what they might consider using in their own cooking… except for the ginger and turmeric, of course. Luckily, my mother had previous experience with besan in her search for flours low on the glycemic index.

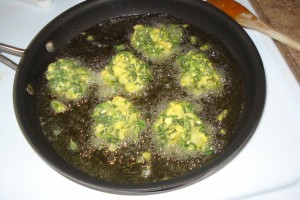
Pakora FryingPAKORA BATTER

1 cup besan (i.e. chickpea or gram flour)
1 teaspoon paprika
1 teaspoon turmeric
1 tablespoon ground ginger
2 tablespoons corn starch (optional)
1/2 teaspoon baking soda
salt, to taste
1/2 cup water

PAKORA VEGETABLES

10oz spinach
1 lb. cauliflower, chopped
diced onion
scallions
1/3 to 1/2 cup cottage cheese, optional

oil, for frying

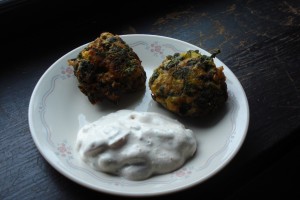
Combine all the dry ingredients for the batter in a medium bowl. Chop the vegetables, if desired. Whisk the water into the dry batter ingredients until smooth. Stir batter into the vegetables until well-coated. Heat oil in a deep fryer or in a skillet. Drop small balls of the vegetable mixture into the hot oil to fry to a golden brown. Serve with raita or chutney.

Vegetable Pakora with RaitaThe vegetables in this recipe, of course, can be changed. These were simply what I had on hand, but this recipe is open to a lot of variation in content. I don’t have a deep fryer and so I always do a shallow fry (i.e. inch or so of oil) in a non-stick skillet. That method worked out pretty well for these pakora, but the batch turned out very large and I was a little impatient so I make the pakora a bit larger, probably, than they should have been. Next time, I’ll make smaller fritters so they get fried through a little better. I also had to add some extra besan because my vegetables had been frozen and released some liquid while defrosting. If using frozen vegetables, make sure your vegetables are thoroughly thawed and dry, or else extra flour may be in order.

All in all, though, these fritters were a hit with my parents, and I quite enjoyed them myself. Definitely a recipe I will make again, and hopefully improve upon in the future.

Around the House Raita

I had a burst of cooking inspiration this weekend. Having been on vacation all week, I did a bit more culinary exploration of local restaurants than normal. I went to a couple Indian Buffets with Sabrina (not really new ones… but you may still be hearing more about them), and I got a chance to go back to Abay, which I had thoroughly enjoyed once before, and now have thoroughly enjoyed a second time.

Tomatoes, Mint, ScallionsAdd to this all a peculiar imperative to find opportunities for my mother eat more food with ginger (also more on that later), and I had an intensive weekend of cooking experiments. As part of the experimentation, I decided to make some Pakora, that is, Indian vegetable fritters, because I had been enjoying them all week at our Indian Buffet trips. I was enjoying them more than usual also because I had taken to dipping the pakora in the raita (a yogurt-based condiment) provided by each buffet. I don’t know if such practice is authentic, or just some spontaneous innovation of Americans at the India Buffet, but I found it tasty and so decided to make a raita to accompany the pakora fritters.

Problem was, I didn’t find all of the ingredients I had hoped to find at my parents’ house. In fact, after scouring many raita recipes online, I found that I couldn’t put together any one recipe in its entirety. I scoured the recipes, getting a feel of what ingredients seemed often to go together and what didn’t. I quizzed my dad on what he had available in the fridge and in his vegetable garden. There was no plain yogurt to be had in the fridge, but my suspicion was that sour cream would do just fine in a pinch. My impression from the recipes I found online was that no particular spices or herbs where standard, and so I put together a raita based on what my parents’ had around the house and in their garden:

RaitaAROUND THE HOUSE RAITA

cherry tomatoes, chopped
fresh mint
scallions
sour cream or yogurt
sprinkle of cumin
sprinkle of paprika
salt, to taste

Combine ingredients and chill.

Obviously, this is not a precisely measured recipe. Nor, I believe, should it be. It should be noted that the cherry tomatoes I found in my dad’s garden were especially small, and having only quartered them, I felt like even then, they could have been smaller. The scallions and fresh mint leaves were easily snipped small. The sour cream was stirred in to the fresh ingredients to create a dip-like consistency without overwhelming the fresh ingredients (I even added a little milk to make it a little saucier). The spices were simply to taste. I did not add salt to the initial batch, for the sake of my dad’s dietary restrictions, but I added some to my own portion.