 When I search for recipes online, sometimes I find things that I didn’t even know to look for. I’m often looking for intriguing twists on ordinary dishes, and while searching last week for some new revelations on the concept of lasagna, I stumbled upon a few recipes for something called Pastitso, billed by recipe posters as “Greek Lasagna.”
I was a little surprised never to have heard of this dish before. I spent many a semester in college studying Greek Orthodoxy, my main point of research in grad school was food customs in Eastern Europe, and failing all of that, from the age of twelve, I lived next door to a second generation Greek family who kept us well supplied with baklava every Christmas. How did this Pastitso come out of thin air?
Whatever confluence of circumstance led to my heretofore Pastitso-free existence, I was determined to end the trend and so tried my hand at a Pastitso recipe this weekend. Just a few words of warning… make sure you’re well stocked on butter and eggs before attempting this recipe; I cut down on the amount of both used in this recipe, but there’s still a lot. Also, I’ve broken this recipe up into stages because, while I’ve tried to simplify it as much as possible, as I am apt to do, this one requires some time, organization, and a fair number of bowls and pans.
Stage One
4 tablespoons butter
1 medium onion, chopped
1 teaspoon minced garlic
1/4 teaspoon ground black pepper
1/2 teaspoon ground cinnamon
1/8 teaspoon ground cloves
1 1/4 lbs. ground meat
1 (16oz) can of diced tomatoes
1 (8oz) can of tomato sauce
1 teaspoon salt (optional)
water, as needed
Stage Two
1 (13oz) box of penne pasta, or other tube pasta
3 tablespoons butter
4 eggs, beaten
1/2 cup grated parmesan
1/2 cup shredded white cheese, such as mozzarella or an Italian mix
Stage Three
2 eggs, beaten
1/2 teaspoon nutmeg
1/2 cup grated parmesan cheese
1/2 teaspoon salt (optional)
dash of white pepper
4 tablespoons butter
4 tablespoons flour
2 cups milk
2 tablespoons dry sherry
STAGE ONE: Melt the butter in a skillet. Saute onions and garlic. Add the spices and saute until onions soften. Add the meat and cook until browned. Add the canned tomatoes. If the mixture is too thick, add water, otherwise if it is too liquid, simmer over a low fire until most of the liquid is evaporated. Luckily, you’ll have plenty of time to let the sauce thicken while you work on the rest of this recipe.
STAGE TWO: Prepare the pasta according to package directions (shave a few minutes off cooking time to keep it al dente, if desired). Melt the butter in a saucepan, allow to cool and meanwhile beat eggs in a large bowl. Beat the cheeses into the eggs and add drained pasta to egg mixture when done. Add melted butter. Stir together and set aside.
 STAGE THREE: Beat eggs in a small bowl. Beat in cheese and spices. Melt butter in a small saucepan (such as the one used and emptied in Stage Two). Whisk flour into butter until combined; add milk slowly over medium low heat. Beat some of the warm milk mixture into the eggs, and then add the egg/cheese/milk mixture to the saucepan and heat until thickened.
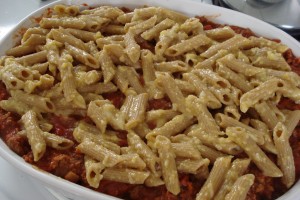
Preheat oven to 350. In a large glass or ceramic casserole (9 x 13), spread half of the pasta and egg mixture over the bottom. Some pastitso recipes call for arranging the noodle tubes in rows, but this is too ambitious for me. Spread the meat mixture over the first layer of noodles, and then layer the remaining noodles over the meat. pour the white sauce over the top layer. Bake for about 25 to 40 minutes, until the top is lightly golden brown.
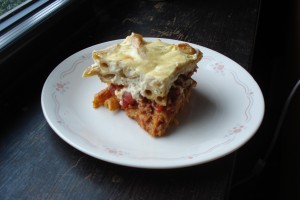
The end result was quite tasty, though not altogether different tasting than normal lasagna. Certainly the cinnamon and nutmeg gave it a different essence than typical Italian lasagna, and the white sauce as topping added an interesting dichotomy of color and flavor. I would recommend using the salt called for in this recipe, if you can. I made this recipe for my dad, so I omitted the salt in the actual ingredients, but ended up having to season my own portions. Unless you have to eliminate salt for health reasons, I would definitely say it’s essential.

