Two Vindaloos

Of all the Indian curry dishes I have tried, Vindaloo seems to manifest with the most different permutations across Indian restaurants. Other curries that are equally widespread seem to be more standardized. If you order Tikka Masala or Korma or Saag (aka Palak), chances are you will get a curry that looks the way you expect, even if the specific recipe of spices differ from one establishment to the next. With Vindaloo, you don’t know what color it will be, whether it will be creamy or dairy-free… the only constant is the sourness of the vinegar, which of course is what the dish is named for. Recipes I have encountered online and in cookbooks vary just as much, leaving me torn and uncertain about which route to take toward Vindaloo greatness!

I recently tried two very different recipes, both with good results:

Vindaloo #1: A more complex vindaloo

1 1/2 tablespoons cider vinegar
1 tablespoon brown sugar
3 garlic cloves, minced
1 1/2 tablespoons ground ginger
1 tablespoon curry powder
1 tablespoon ground cumin
1/4 teaspoon ground cardamom
1/4 teaspoon ground cloves
1/4 teaspoon ground hot pepper
1 tablespoon mustard seeds
2 tablespoons olive oil
1 cup tomato sauce
1 cup water
1/2 teaspoon ground cinnamon
1 small onion, chopped
3 boneless skinless chicken breasts, cubed (or equivalent amount pork, beef, lamb, etc)
2 tablespoons fresh parsley

images (3)Combine all ingredients in a saucepan or crock pot (use half the water for crock pot). Before adding the the meat, I like to process with my immersion blender to puree, but that’s up to you. The onion and garlic don’t strictly have to be pureed into the sauce, and whole mustard seeds add a nice texture — they won’t be completely pulverized by an immersion blender anyhow. Cook covered on low fire until meat is desired tenderness. If using a crock pot, 4 hours on high or 8 on low should do it. Serve with rice, garnish with parsley.

This Vindaloo turned out quite tasty. In fact, I loved the flavor of this spice combination and can say absolutely nothing against the way it turned out in terms of taste. However, I was less than thrilled with the color. It happens sometimes with recipes that feature the darker spices (cinnamon, cardamom, cloves, etc.) as their dominant characteristic that the color of the curry is affected (e.g. chettinad curry), and such was the case here. This curry ended up a very drab brown color. Most Vindaloo I’ve ever had before is some manner of red or orange color, sometimes a little brighter sometimes a little darker, but usually has a bit of zest to its color. This recipe had none and I was disappointed in that result. Call me crazy, but given the choice, I’d rather have a colorful and flavorful dish!

I remembered a Vindaloo recipe I tried many years ago when I was first experimenting with Indian cuisine. It was a much simpler recipe, but I recalled that it had turned out a nice stark orange. I dug up the recipe last week and gave it a try:

Vindaloo #2: a simpler recipe

DSC018661 medium onion, chopped
1 tsp minced garlic
1/2 cup red wine vinegar
1 tablespoon ground ginger
1 tablespoon ground coriander
1 tablespoon ground cumin
1 tablespoon turmeric
2 teaspoons cayenne pepper or paprika
1lb. chicken, beef or lamb cubes
1/2 cup to 1 cup water
cilantro leaves, optional

Combine onion, ginger, garlic, vinegar, and spices in a saucepan or crock pot. Process with an immersion blender, adding water until the sauce is the consistency of a thick gravy. Stew the meat for a few hours on low heat until desired doneness, or slow cook for 4 hours on high, 8 on low. Serve with rice, garnish with cilantro.

This recipe is much simpler. The flavor is very good; the larger amount vinegar gives added tanginess. The color is it nice bright orange! However, I missed the more complex flavors of the first recipe.

For now, I am posting both of these recipes for preservation; they are both worthwhile and make for a great meal. I have not, however, given up on discovering or formulating a recipe that represents the best of both worlds.

African Peanut Soup

This is one of my very favorite soup recipes. It can be made mild or spicy. It is creamy (due to the peanut butter) and yet also completely dairy free. All in all, a wonderful combination of flavors; a delicious pureed vegetable soup!

702ccf7619929e989ed9e0c44246ad62SARAH’S AFRICAN PEANUT SOUP

1-2 tablespoons oil
1 onion chopped
2 cloves garlic minced
1 cup water or vegetable broth
1 tablespoon ground ginger
1 (29oz) can sweet potatoes, drained and rinsed
2 carrots, chopped
1-2 bell peppers, red, yellow or orange
1 tablespoons paprika
1 teaspoon cayenne, or more paprika
1 (6oz) can tomato paste
1 (8oz) can tomato sauce
1 tablespoon brown sugar
1/2 cup peanut butter
crushed peanuts and chopped green onions

Heat the oil in the bottom of a large saucepan. Saute the onion and garlic for a couple minutes until softened. Add the water (or broth), the ginger, potatoes, carrots and bell pepper. Simmer for about 20 minutes. Add remaining ingredients. Use cayenne pepper only if you want to make a spicy version of this soup. Process with an immersion blender until smooth, or process in batches in your food processor. Heat through. Serve garnished with crushed peanuts and/or chopped green onions.


Not only is this soup very tasty, but it is also absurdly easy if you have the right equipment. Every home chef who finds him- or herself with a need to puree — even on an infrequent basis — has absolutely no reason at all not to invest in an immersion blender. Food processors are great, and they are necessary for certain tasks; I still use my food processor for thicker or tackier recipes like dips and spreads (e.g. hummus, salmon spread, artichoke dip, etc.), noodle or bread dough, and curries or curry pastes with whole spices that need to be well-pulverized. But any recipe project a bit more liquid in consistency is made so much easier with an immersion blender.

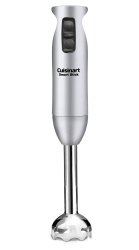
It has, however, recently come to my attention that all immersion blenders are not created equal. One of my students was telling me about a carrot soup she planned to prepare for a holiday meal. She bemoaned the annoyance of pureeing the soup in batches using a food processor. I, of course, extolled the virtues of the immersion blender, but she told me the last time she’d used an immersion blender it was disappointing and ineffective. I could hardly imagine what went wrong; perhaps some blenders are just not very good quality, or don’t have very sharp blades, perhaps she had been using a blender intended for lighter jobs like mixing powder additives into smoothies. Either way, I recommended my blender, a Cuisinart. She came back the next week and reported that she had purchased a Cuisinart and it had worked like a charm! So, if you’ve had disappointing experiences with immersion blenders in the past, don’t despair! The Cuisinart is designed for heavier-duty food processing, and I highly recommend it.


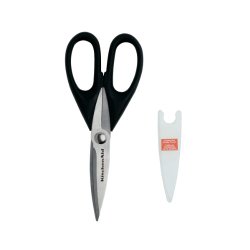
The other kitchen item that will help you immensely with this, and similar, kitchen projects, is a good pair of kitchen scissors. Most people keep scissors in their kitchen the sake of opening packages, but many have never considered using them for food preparation. In this recipe, for instance, kitchen scissors make the job of slicing green onions a snap. Why drag out the cutting board and slice when you can simply hold the onions and snip? Kitchen scissors are excellent for all sorts of herbs and small greenery. You might not think to use them for cutting larger vegetables, but in a recipe like this where the veggies end up pureed anyway, I like to use the kitchen scissors to open up my bell pepper. Again, it saves breaking out (and washing later) the cutting board and knife. I cut the pepper open, or in half, wash out the seeds under the faucet, and then put the flesh in whole. It will just soften up and get pureed anyway, so why go to all the trouble of slicing or dicing? Kitchen scissors are also very useful in trimming the fat off meat and shredding cabbage or lettuce (just roll the leaf and cut slim ribbons). Once you get a pair, you will find more and more uses for it in your kitchen.

Wine Log: All the Grape, but none of the Glory

I’ve been making wine kits for about a year now, and I have been very pleased with the result… and yet, I find them creatively unfulfilling as a hobbyist.

The only kits I have used so far are the Reserve du Chateau 17.5 lbs. kits, which, as far as I can tell, are an Amazon.com proprietary or exclusive brand. Thus far, I have tried the Sangiovese, the Cabernet Merlot and the Cabernet Shiraz. The great thing about these kits is the price. At roughly $45 to $55 a kit (like all Amazon items, the price mysteriously fluctuates day-to-day), these kits give me real wine grape concentrate for about the same price per gallon (i.e. $8-$9) as making the 4 Canister Concord Red, the only truly red wine I’ve been able to make without a kit. To be honest, I didn’t really like the Concord Red I made (one recently-opened bottle that didn’t clear well has become dedicated to cooking), and so I’d be crazy to continue making it when these kits are the same cost AND include additives and corks (in fact, I may never have to buy corks again!).

One downside of these kits, however, is that they are apparently so popular, they keep going out of stock. I jumped on three kits last month when they came briefly back into stock, and I’m glad I did, because there’s nothing to be found in that price range right now. There are other wine kits, of course, but the price of those kits are $70+, and at that point, the benefits start to wane. Sure, they may be higher quality juice or whatnot, but if I’m being perfectly honest, I’m not looking to recreate Napa in my apartment here. One major motivating factor in making my own wine is to end up with a product that represents significant savings over what I could purchase at the local state store. I can get a nice Carlo Rossi Cabernet in the 5L box for $17. At that point, the cost/benefit of expensive kits that provide only a few dollars savings per gallon… doesn’t seem worth it.

As a cost-conscious wine consumer these Reserve du Chateau kits provide a good-tasting wine at an advantageous price point. As a wine-making hobbyist, however, I find them ridiculously easy. What’s wrong with easy? Well, nothing fundamentally. Certainly, there is enough labor in the over-arching wine-making process (especially at the end with siphoning, cleaning, bottling, etc.) that I wouldn’t beg for the process to be more complex. It’s just that whenever I hear accolades from people about my kit wine, I sort of feel like I can’t really take credit. One of my students, for instance, has followed my wine-making progress over the years, and upon trying my kit Sangiovese, he effused praise over the vast improvement since the last wine of mine he had tried… but I didn’t feel like I could truly take the compliment, as I hadn’t done much of anything to affect the wine quality during my end of production.

Perhaps if I had done a wine kit as my inaugural project, before I had attempted any other homemade recipes, I would feel greater satisfaction with the end product, having learned the craft of wine-making along the way. But I’m actually quite glad I did not. The directions for the wine kit are full of a lot of unnecessary hullabaloo that I can confidently wave off, having honed my process on other batches. Perhaps for people who make as big a production out of the process as the directions indicate, using a kit fills them with a glow of creative satisfaction, but I know better.

The grape juice concentrate comes in a bag (think like the inner bladder/bag of a boxed wine); all the necessary sugar water is already in the bag, too. The Reserve du Chateau kits have some manner of yellow spigot/opener on this bag; I have yet to figure out how to open it. On my first kit, I gave up after several tries and simply cut a small corner off the bag with my kitchen scissors to create a small hole from which to pour the sugar and concentrate into my carboy (I use a large funnel to ease the process of adding all ingredients to my carboy). Since then, I never bother with the opener, I just cut the hole and pour it in. I hydrate my yeast (as described in my Getting Started entry), which the directions, oddly enough, do not suggest. Sometimes I use the yeast that comes with the kit, sometimes I use Red Star’s Pasteur Red; haven’t noticed much difference in using one or the other. I add the packet of bentonite that comes with the kit. I also add a tablespoon of yeast energizer to speed the process. I DON’T include any other of my standard additives like pectic enzyme or acid blend. Just the included concentrate, hydrated yeast, bentonite, water to fill. Balloon airlock on top (also described in Getting Started). Haul it over the the hall closet and wait for it to ferment completely.


I honestly don’t know what would be the advantage in making this process more complex. Using a fermenter bucket is unnecessary because it’s just juice and not fruit. Thus, there is no need to start the wine in a primary fermenter, siphon to a secondary fermenter a few weeks later, etc. The directions also make a big ordeal about degassing the wine, but I’ve never had an issue with leftover carbon dioxide in my red wine, perhaps because agitating the carboy in order to “read” the stage of fermentation with the balloon airlock is such an important part of my process, that perhaps degassing happens automatically? Just another reason to use balloons and not airlocks, as far as I’m concerned. Some people seem to like using a hydrometer, and the directions call for one. It seems unnecessarily fussy to me because using a balloon tells me all the information I need to know about where I am in the fermentation process (also described in Getting Started). If you use an airlock it may be helpful, but I don’t soooo… Shrug? Why make the process more involved? It’s still just four basic ingredients, no matter how much you fuss over it.

The only revision I have made to my process of making wine with kits is investing in a 6.5 gallon carboy. Making it concentrated to a 5 gallon carboy (all the kits are 6 gallon), I could never get it as dry as I wanted. When I reconstituted it into six one-gallon jugs, it always had a lingering sweetness. My wine-making mentor at the studio described my first batch of kit wine as “semi-dry.” Semi didn’t cut it for me; I wanted it truly dry. I bought a 6.5 gallon carboy just for making the kits because I only intend to make red kits (my fruit wine pursuits satisfy my taste for whites), and red tend to foam up more vigorously at first fermentation, so having an extra .5 gallon of airspace keeps the yeast from foaming up into the balloon.

As I mentioned above, even with the kits, I use a balloon airlock. The balloon will stretch to fit the carboy opening. It also helps me immensely in determining when fermentation is actually complete, which is vitally important for getting the wine kits truly dry. Whenever a balloon flops on any batch, I always stir up the jug or carboy by grabbing the neck and swirling it around to agitate the contents. Most of the time the balloon will inflate again. One of my daily to-do items around the house is checking on my in-progress batches and agitating all the ones with floppy or wrinkly balloons. Sometimes, if I’ve been agitating the same batch for a couple weeks and the balloon still fills up, I might make the call to finish the batch despite its having a little life left in it. When I’m making a sparkling wine, for example, it can even be advantageous to siphon the batch while the original yeast is still active because it will help the process of in-bottle carbonation. Sometimes, I’ll just siphon the batch out of impatience, in part because I know it won’t make that big of a difference. If a batch of apple wine, for instance, isn’t completely and utterly dry, it’s not so noticeable. The kits, however, have a higher quality and higher flavor complexity juice (not trying to oversell them, just saying so in contrast to apple juice from the freezer aisle). They also have a built-in flavor association with store-bought dry red wines we’ve known and loved. A little bit of sweetness makes a big difference when our palates are expecting a classic dry red.

When I make a kit, I push the fermentation as far as it will go. First off, let me make a public service announcement — anyone attempting these kits should be well aware that the promise of a 4- or 6- week wine kit is completely and utterly false. Fermentation takes as long as it takes. Lots of factors are at play, and if you wait a certain number of weeks, rather than using some other measure (e.g. balloon airlock, hydrometer, etc.), you are probably going to get an incomplete wine. Not so terrible for lovers of sweet wine, I suppose… but really, why are you buying a Cabernet kit if you want sweet wine? They have plenty of “Arbor Mist” style fruit wine kits, Sangria kits, Moscato kits, etc.

DSC01863I’ve had a kit of Cabernet Shiraz going since January 31, 2015. When the balloon began to flop, I agitated the carboy every day, and every day it filled back up. It wasn’t until last night (April 22nd) that, even after vigorous agitation, the balloon would not fill. This morning, I discovered that the carboy had even formed a vacuum, pulling the balloon inversely into the carboy, which is always a good sign that fermentation is probably done. Still, I did a good 30 seconds of vigorous agitation just to be sure, and the balloon did not fill or even change. See the included photo of what my balloon looked like even after those 30 seconds of agitation.

Next in the process, after letting the sediment in the carboy settle for a few days, I will clean and sanitize six one (1) gallon jugs. Some people would siphon into a second carboy at this point, but I have tons of gallon jugs from a compatriot who is a generous drinker. Using gallon jugs for the next stage has other advantages, too. After cleaning, I put a single campden tablet into each jug and fill them from the carboy with my siphon one by one. It is worth noting that I do NOT use the clearing additives included in every kit, chitosan and kieselsol, because I’ve never found that one of the kit wines needed them; all the kits I’ve done have come out quite clear in the end. I save the additives for unrelated batches that have trouble clearing.

A few of the six jugs will be allocated for longer term bulk aging, while the remainder will be bottled as needed. Whenever I bottle a gallon batch (which produces five standard 750ml bottles), I always do a mix of corks and caps. One or two will be a screw-top bottle or a T-cork (i.e. tasting cork, which is synthetic and reusable) for sooner consumption, and the rest will have regular corks with the intention of aging the wine in bottle a while. I usually try to age all of my corked bottles at least a year (post-it notes on each bottle with the month/year of production help me keep track). I’m pleased to report that the kit wines are actually pretty good even just after fermentation is done. I’ve only been making them for about a year now, so I haven’t tried the longer-term bottlings yet, but my hope is that the inherent character of the grapes will come out more the longer they age.

Despite feeling I can’t take much credit for the production of the kit wines, I have no plan to stop using the kits anytime soon. They have, however, inspired me to pursue a more challenging path to creating red wines — my Cabernet and Zinfandel vines went in the ground last week. When they start fruiting, new wine-making adventures will surely follow.

Thai-style Peanut Sauce

This recipe is amazingly delicious and versatile. It works as a sauce for noodles (hot or cold), a marinade for meat or fish, a slow-cooker sauce or as a base for vegetables and meat in a thai-style curry over rice.

SARAH’S THAI-STYLE PEANUT SAUCE

1/2 cup creamy peanut butter
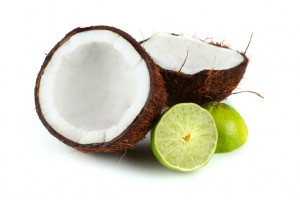
1 (14oz) can coconut milk
2 tablespoons lime juice
2 tablespoons soy sauce
1 tablespoon brown sugar
2 teaspoons ground ginger
1 teaspoon minced garlic
dash of cayenne pepper (or to taste)

images_Coconut_Lime_Ver_4bc68778a6e3d1Combine the above ingredients in a bowl or saucepan or crock pot. I like to use an immersion blender to integrate the peanut butter and puree the garlic. Use cold as a sauce for noodles, for dipping or as a marinade. Add meat and/or vegetables to the sauce for slow cooking or heat in a pan for curry or noodles. Garnish with fresh cilantro.

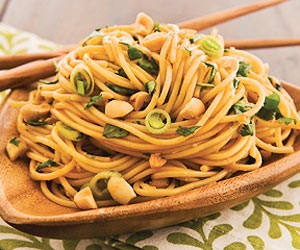
I’ve used this sauce many times before with meat (usually chicken) and vegetables as a curry over rice. This past weekend, I decided to combine it with some faux crab meat (chunk style), put it over noodles and garnish with some green onions.

I ran into a bit of a roadblock with the noodles, however. Having been to two different Thai restaurants in the last few weeks, I noticed that the menus included noodle dishes containing Thai egg noodles. However, when I was out and about at grocery stores this week, I could only find Thai rice noodles. The Thai egg noodles I’ve had in the past — and thus the ones I had in mind — have been relatively wide and flat, not unlike fettuccine. Browsing other types of Asian noodles at these grocery stores, I found nothing to replicate that memory of Thai egg noodles. I couldn’t even find any on Amazon.

I realized, of course, that I could very well make my own noodles. Flour, eggs and a pasta maker were already in my kitchen. I’m always reluctant to make my own noodles, however, because of the cleanup. Making dough, be it water- or egg-based, is always easy in the food processor, but the extra flour required to ease the dough’s path through the pasta maker gets EVERYWHERE. It’s one thing to clean up my workspace, but to have to clean the floors and every stray little item nearby with a light dusting from clouds of flour doesn’t seem worth the effort.

thai-peanut-noodles-11900012rca-ssAfter hitting my last dead-end with the search for something that could pass as a Thai egg noodle, I promised myself that if I felt ambitious enough the next day, I would make my own noodles, but if not, I would simply use the angel-hair-like Chinese egg noodles already in my cupboard.

I was up early the next day without much else to do, so I decided to attempt the noodles. The idea struck me that if I could make the dough just dry enough, I might not need to add extra flour and make a mess. I started with a cup of flour, added a couple eggs, added a bit more flour, etc. until I got a food processor full of fine, powdery dough that formed a somewhat tacky ball when I grabbed a handful and worked it with my hands.

Here is the recipe/method I came up with:

SARAH’S EASY EGG NOODLE DOUGH

2 cups flour (plus at least 1/4 cup in reserve)
3 eggs

Combine the flour and eggs in the food processor. If your eggs are large, you may want to start with two, and reserve the third. The result should be a mealy or powdery substance that will form a ball of dry-ish dough when kneaded in batches. If the dough does not hold together when you try to form a ball, or if it stays somewhat together but cracks, then it is too dry. If the dough won’t even hold together, add your third egg; if it holds together but is too dry to knead without it cracking, try adding a tablespoon of water. If it is too sticky to go through the pasta maker (the pasta maker rollers should be dry without any sticky dough residual after the dough goes through), return the dough to the food processor and add a tablespoon or two of flour. Depending on how large your eggs are, you may need to add more or less flour. Just keep adding it a tablespoon at a time until you get your desired result.

I was able to make a dough with about 2 cups, plus one tablespoon flour, and 3 medium eggs that needed no additional flour for the pasta maker. The process created a few dough crumbles, but they were much easier to clean from my workspace, counter and floor, than a ubiquitous dusting of flour.

Eggplant Lasagna (i.e. Noodle-less Lasagna)

There are a lot of recipes for low-carb lasagna out there. Most of them involve doing something labor-intensive to slices of eggplant or zucchini. Sure, a breaded and fried eggplant parm can be a wonderful thing, but I’m just looking for a low-carb alternative to lasagna noodles. Armed with a new mandolin slicer, I decided to make a direct substitution of eggplant slices for noodles.

Building from my regular lasagna recipe, I endeavored to make a low carb alternative. Because I was also making meatballs to accompany this dish, I did not put meat in the lasagna. Adding meat to this dish would be as easy as browning a pound of ground meat and mixing it in with the sauce before layering. Also, I didn’t have ricotta on hand, so I substituted goat cheese.

DSC01814SARAH’S EGGPLANT LASAGNA

1 tablespoon butter
1 small onion, chopped
1 teaspoon minced garlic
3-4 plum tomatoes, chopped
1 (6oz) can of tomato paste
6 oz of beer or red wine
salt and pepper, to taste
cayenne pepper, to taste
fresh basil and parsley, to taste
4 oz. goat cheese or ricotta cheese
1 egg
1/4 cup grated Parmesan cheese
1/4 cup sour cream
one medium to large eggplant
1-2 cups shredded mozzerella or Italian cheese blend

Preheat oven to 300. Saute the onions and garlic in the melted butter in a medium saucepan until onions are softened. Add chopped tomatoes, paste, booze, salt, pepper. Cook until tomatoes break down. Add fresh herbs and cook until wilted in the sauce. Process with an immersion blender or in a food processor. Cook the sauce down so it’s thicker than an ordinary pasta sauce. A thicker sauce (i.e. less liquid) is necessary in this recipe to offset the liquid that the eggplant will release as it bakes.

If you want to add one pound ground meat, do so now. I recommend browning the meat first in a separate skillet before adding to the red sauce.

Meanwhile, combine the goat cheese (or ricotta), the egg, the parmesan and the sour cream in a separate bowl. If using goat cheese, a fork or whisk will help break up the cheese. Beat or whisk until as smooth as possible.

Quarter the eggplant lengthwise. Slice thin with a mandolin slicer. Spread a thin layer of sauce on the bottom of a 9×9 square pan. Put down the first layer of eggplant slices. Spread with a layer of cheese mixture and then another layer of sauce. Repeat layering: eggplant (I like to alternate each layer crosswise), cheese, sauce. Finish with a layer of eggplant and sauce.

Bake at 300 for one hour. Add shredded cheese and bake for another 45 minutes. The long and slow baking time helps to get rid of excess liquid without burning the contents of your casserole. If your oven runs hot, you may even want to try 250.

This recipe turned out quite tasty, indeed. The eggplant was soft, but sturdy, like a noodle, and the layers held together quite well. The goat cheese as ricotta substitute worked out quite well and makes me think I’d like to try it in a regular lasagna as well. This recipe also makes me curious to try other vegetables as noodle substitutes, perhaps zucchini or some kind of squash or sweet potato.

Invisalign: After the Aligners

10294513_10152040029595952_5248877868177228697_nI’ve been functionally done with treatment for almost a year now now. All told, the actual treatment took about a year longer than the original projection… but that’s okay. The refinements stage is the easiest stage; after 40-some trays of initial treatment, 20-some trays of the first stage of refinements, the prospect of 15 more for a second round was no sweat. Refinement aligners are only worn for one week each — who cares if they get stained? That’s more often than I change my disposable contacts! Refinement trays also represent a smaller and more subtle tooth movement each time; any pain or discomfort is really negligible. By that point I was so accustomed to wearing the aligners, and very personally invested in getting the most out of my treatment — besides getting my $5K money’s worth, going through this process made me more interested in my teeth. I made the primarily-cosmetic decision to fix my teeth as an adult, and I became invested in the process. With all the initial worries of treatment behind me, continuing until my orthodontist said we had reached the end was a natural one.

There was only one surprise along the way. Between Refinements #1 and Refinements #2, Invisalign switched to a new primary aligner material, Smarttrack. I did notice that the first aligner of my new refinement set seemed an easier fit when they first put it in at my orthodontist’s, but I didn’t suspect anything was truly different until about an hour later, strolling through our open market, the Strip District, when a rough spot suddenly appeared on my aligner over my center bottom teeth. Was my aligner cracked? Already? Cracked aligners had happened to me once or twice. No problem. With the refinements being so subtle, I would just pop the second aligner in early and wear it for two weeks, rather than one. By the time I got back home, a corresponding rough spot had emerged on the corresponding tooth on my top aligner. I switched to my second set… and two hours later, a rough spot emerged in exactly the same place. I compared aligner envelopes from last round, and sure enough, the new round said “Smarttrack” in the same place the old round said “EX30.”

DSC01718 copySuffice to say, I was a bit miffed. I left a message at my orthodontist’s office and did some online research. Other people had indeed experienced the same trouble with the Smarttrack aligners, but usually toward the end of their required time for wearing the aligners. When my orthodontist’s office got back to me, they explained that the Smarttrack material requires a “comfort liner” and that shredding is possible but rare. Indeed, upon closer look, I saw that the rough spots on my aligners were places where the thin liner had broken, as if a small hole had formed in a layer of Saran wrap and was peeling off.

The problem, it appeared, was that the quite indestructible nature of the EX30 aligners had turned me into something of an “aligner grinder.” I don’t grind my teeth when the aligner, or now retainer, are out, but when they’re in, I gnaw away. My orthodontist gave my permanent retainer extra thickness to handle it and made it in-house out of a different material. This turn of events is perhaps not surprising. I have always been something of a mouth-fidgeter. One of the great things about having straight teeth now is that I used to worry at the crooks in my crowded bottom teeth with my tongue when I got stressed. Now there are no crooks to mess with. During the Invisalign process, this tendency must have converted to grinding.

All I can say is that I’m glad I didn’t get Smarttrack until the last stage of refinements. I don’t know if I could have made it through the original course of treatment wearing 42 aligners for two weeks each. With an iron will I did my best to retrain myself not to grind my teeth (I do it when awake and not while sleeping). It worked to a certain extent, but by the last day or two of each Smarttrack aligner, there was usually at least one small bloom of shredded plastic, though mostly on my molars which made it easier to ignore than on my front teeth. I did successfully stop grinding in the front of my mouth.

DSC01714 copyTo the credit of the Smarttrack, I can attest that they certainly are more comfortable. They are very elastic, and I can only imagine that makes them easier to wear during the first stages of treatment. I’m betting they virtually eliminate the problem of aligners being so tight at first it’s hard to pop them out. Being more elastic makes them, not only easier to get on and off, but better able to hold their shape. I could tell that my aligners were nudging my teeth more gradually into place throughout the entire week, rather than shoving them all at once into place on the first night, and then keeping them there for the rest of the wearing period. Also, in the interest of complete fairness, I have a friend who was also going through Invisalign at the time I was wearing the Smarttrack, and he didn’t seem bothered by the little bit of shredding he noticed — in fact, he hadn’t even noticed the change in material until I asked him about it.

All of these good qualities will give people who are worried about or sensitive to tooth pain a great advantage in using Invisalign. This treatment was already gentler than braces, but with the Smarttrack, I can’t imagine a kinder and softer way to move your teeth. Also, if the other claims of Smarttrack are to be believed, the process may even happen faster, since the new material moves teeth more efficiently and effectively.

Grinders beware. Where people who grind their teeth actually did better with the EX30 than their non-grinding counterparts… Smarttrack is a whole new ballgame. I’m not sure if they will even make a set of EX30, but if you grind your teeth, I would advise asking your orthodontist if the old aligner material is still available for your treatment.

DSC01713 copyOtherwise, I’m settling well into post-aligner life. I got my permanent retainer in December 2013. It is indeed much thicker than the aligners. When I first put it in at the orthodontist’s office, it almost made me gag, but I’ve gotten used to it. In fact, I sometimes wear it out on errands in the morning or over the weekends. I couldn’t wear it to work — the way it effects my speech is more noticeable than the aligners, but not so noticeable that small transactions and interactions at stores would draw anyone’s attention. Despite the thickness of the retainer, my powerful grind was enough break my top tray after six months of wear. My orthodontist made me a new one at the time, but it looks like I will definitely be needing to replace my retainers on a regular basis as time goes on in order to continue good retention.

Overall, I’m very happy with the result of my treatment. My advice to anyone researching Invisalign is to go ahead and do it… with the caveat that you use an Elite Provider. My doctor in the Pittsburgh area is King Orthodontics. If you are a Pittsburgher, make them your first and last call. Anywhere else, go to an Elite provider, even if it involves a little inconvenience to get there. Experience and customer service make the biggest difference in this process. I am very glad I opted for Elite over even the Premier Preferred providers I looked into. Please, if you’re considering Invisalign, do the research, don’t go to a dentist, and don’t go to someone who specializes in metal braces. Elite providers specialize in Invisalign -go there!


Wine Log: The Trouble with Reds, or To Wine-Kit or Not to Wine-Kit

red-wine1From the beginning of my wine-making adventures I always prided myself in the fact that all of my wines, for better or worse, were my own homemade, from-scratch recipes. I started using only juice concentrate. I moved into making small batches with fruit, sometimes on its own, sometimes in combination with juice concentrate. I had many successful whites and many successful blushes, and even successful meades.

The trouble was red. I’m an equal opportunity wine drinker, but when given the choice, I opt for red nine times out of ten. Naturally, when faced with a choice of juice concentrates for my first attempt at a gallon batch, I picked red grape juice. It was a good batch, but it turned out blush. Great! I was happy enough for a dry and drinkable first batch. When I took another attempt at red, I went for two cans of concentrate, aiming for a red.

Well… it wasn’t red. It wasn’t exactly a traditional blush, either. The color was more of a fuschia. Okay then… surely three cans of concentrate would do it. Properly constituted, three cans of concentrate is MORE than a gallon of juice. But alas, still not red! I made a few three canister gallons with a couple different types of dark juice, and all of them turned out to be a deep ruby color, but not red. I even tried adding raisins to my batches when a wine connoisseur advised me that grape skins add important tannins and flavor profiles during fermentation. Clear ruby again! Tasty… in fact one turned out to taste just like cream sherry… but still not red.

b801228h-300-FOR-TRIDION_tcm18-129146I suppose one should consider that the definition of a “red wine” is not fixed. What makes a red wine a red wine and not a blush wine? Where do we draw the exact line between red and blush? My own colloquial reckoning of red vs. blush is that blush, no matter how deep in color, is easy to see through. A red wine, if held up to the light, may have refractions of light shining through it, but also has a somewhat inky, light-blocking quality. It is a continuum, of course. A pinot noir is going to be the most see-through of the reds. Cabernets or dark chiantis, less light refraction. But ultimately, I know a red to see it and none of my attempts fit my definition.

I took to the internet and googled. A lot of people use store-bought kits to make red wines at home, but I wasn’t ready to concede defeat — or to purchase a $70-$80 kit. I found one recipe by a home wine-maker who made a gallon of red with 4 cans of Welch’s Grape Juice Concentrate. FOUR! That’s the equivalent of two gallons of juice condensed into one.

In one last ditch attempt I tried the four cans in one gallon. At long last! A red wine that truly turned out red! Here is my basic recipe for Concord Red, honed over the course of several ensuing batches. Please ready my Getting Started blog before actually attempting any of my recipes. All recipes assume previous at least some knowledge of my general process:

SARAH’S CONCORD RED WINE

4 cans of concord grape concentrate
zero additional sugar
1 cup of strong black tea
1/2 teaspoon yeast energizer
1/2 teaspoon of bentonite
1/2 teaspoon pectic enzyme
red wine yeast

Hydrate your yeast and brew a cup of tea. Heat the juice concentrate in a large saucepan, if you like, to sterilize it, but do NOT add any further sugar (the small amount of sugar used in hydrating the yeast is fine). There is more than enough sugar already present in the 4 cans of concentrate. The first time I tried this recipe and added my usual 2 cups of sugar, I could not get the batch to ferment to dry, despite a few separate attempts to restart fermentation.

Sangiovese-Sorelle-09-12-copyPrepare a clean gallon jug. Add the yeast energizer and pectic enzyme. Bentonite isn’t strictly necessary, but I’ve found it’s a safe bet for darker wines, as they are more prone to clearing problems (more about bentonite below). The other significant omission here is acid blend. Almost all my blush and white recipes include acid blend, but it will make your reds too crisp (another lesson learned from making kits… more below).

Combine the concentrate and tea with your additives already in the jug. If the mixture is still hot to touch, wait before adding the yeast. Once yeast is added, fill jug most of the way full, but maybe an inch or two below the neck. Darker and denser wines ferment vigorously at first. If you fill the jug too high, it will froth up into your balloon or airlock. Skimp on the extra liquid now, and top it off later when you rack it into a second jug with the campden tablet at the end of fermentation.

So, my concord red recipe is now honed… but it’s sort of limiting. I tried making a quadruple concentrate recipe with other types of red juice, Wild Berry and Blueberry Pomegranate, but both of these turned out dark ruby blush. The 4 cans of concord is the only way I’ve been able to make a “real red” using store bought juice. I can get a little creative by adding fruit (or preserves) to this recipe. I’ve done blackberry, blueberry and strawberry reds this way. But I still felt my red repertoire was lacking.

Thus my temptation kicked in to try a kit. I asked our wine-makers at the studio and they reported having tried a wine kit with success, but little creative gratification, saying that it felt more like putting together a chemistry set than making a wine of their own.

But, there are worse ways to obtain six gallons of red wine, right?

My resolve was sealed upon further research. Amazon offers wine kits in the $45 to $55 range (depending on if you use their Subscribe & Save option to order it) with free shipping. When I crunched the numbers, I realized I was paying basically the same price, per gallon, for the juice alone to make the 4 canister recipe above… and let’s face it, even the best concord wine is still concord wine. The complexity of a real varietal wine grape at roughly the same price is no contest for concord. It would be worth the price for the juice alone, but these kits also come with corks and additives and yeast and sugar already added to the juice. The kits also come with labels and shrink caps for 30 bottles, but my thought is… I go to enough trouble getting these things OFF the wine bottles I intend to reuse, why on earth would I then put them back on?

Intrigued by the promise of varietal wine grape juice at the same cost as concord, my only concern was how much control I would have over the process? What if I wanted to use my own additives? My own yeast? Etc., etc… I figured the yeast would have to be packaged separately, but would the initial additives already be dissolved in the juice? The sugar is, but not the additives. Essentially, I am free to use whatever additives I please and prepare the juice according to my own recipe, if I wish.

But upon reading the directions provided with the wine kit, I made a few key discoveries. First, the kit did not include any sort of acid or acid blend as an additive, while it was listed as one of the possible ingredients on the box’s master list covering bases for all the varieties in its wine kit line. It did, however, include bentonite, which I had never used before. I was vaguely familiar with this additive as a clearing agent, and so I was curious to read that the directions called for it to be added before fermentation, rather than upon finishing.


I took to the internet to do some research into bentonite. Apparently, it can be added before or after fermentation to aid in clearing, but it is more effective when added at the beginning. The bentonite attaches to certain particles and then drags them down to the sediment layer as it settles. Adding before fermentation means that the bentonite will keep getting kicked up, keeping it circulating throughout grabbing more particles. I added it to my kit and ordered my own supply online right away. It has helped some stubborn old batches to clear, but has done the most wonders for newly started recipes that I’ve had trouble clearing in the past.

I finished up my first wine kit this week, an Italian Sangiovese. It’s difficult to say at this point how it will be. I tried some just to make sure it was dry enough to finish off, which it was, and to make the decision whether to keep it concentrated (it was a 6 gallon kit, but I have only a five gallon fermenter), which I also did. I use my five gallon carboys only for fermentation, and never for clearing/aging. I have only two of these large fermenters, and I have a ton of gallon jugs. To finish off the Sangiovese, and convert it to six gallons, I took 6 one gallon jugs, crushed a campden tablet into each, and then added 3 cups of filtered water to each one before racking the wine into them.

The other decision I made, fairly early on, was that I would not add the chemicals included in the kit to clear the wine at the end, chitosan and kieselsol. I’ve never needed such clearing agents before, and I would rather get away with using fewer additives whenever possible. If the Sangiovese becomes a challenge to clear, perhaps I will try these additives in the Chilean Cabernet Merlot kit that is currently in fermentation. Then again, its balloon is already deflating, after only two weeks! I’m guessing it’s because I added a tablespoon of my own yeast energizer to the batch, which I did not do with the Sangiovese… also, it’s been warm this week. I don’t plan to rack the Cabernet/Merlot anytime too soon, though. A quick stir easily fills the balloon back up, and after racking the Sangiovese into jugs, I’m kinda low on jugs. Yikes! Guess I have to get bottling, especially because I’m looking to increase production of Apple. There will be some serious jug shortages this summer, I fear.

Also this week…

Started a batch of double concentrate Apple with 3 times the acid blend and Montrachet yeast in search of that elusive tart cider flavor.

Replaced the Sangiovese in one of my large carboys with a five gallon batch of single concentrate Apple with double acid (i.e. 2 teaspoons per gallon) and champagne yeast.

Racked that annoying Cranberry Apple batch that has been fermenting since October into a finishing jug for aging, along with a 1 1/2 Apple with 2 times acid.

Started a new recipe for my popular Raspberry & Pear wine using Welch’s White Grape Raspberry and two pounds of pears.

Wine Log: Apple Experimentation

After a year and a half of wine-making, I’ve gotten to the point where I have hundreds of gallon batches (and a few 5 gallons) under my belt, cupboards stocked full of corked and aging bottles, and a solid base of knowledge for growth and experimentation.

Apple WineWith spring temperatures (finally!) becoming the norm, it’s the perfect time to step up production. I’ve been through two winters, now, as a home wine-maker, and one of the most frustrating things about the cold weather is that fermentation slows to a crawl. This winter in particular has prompted me to start dating each batch with start of fermentation, just out of curiosity. I have at least one gallon batch (cranberry apple) that has been fermenting since October (learn more about my process here), and while it is slowing down, its staying power is persistent.

The promise of faster fermenting provides the perfect opportunity to stock up on one of the staples of my repertoire: Apple Wine. After the long winter, I’ve found myself in a “wine, wine everywhere and not a drop to drink” situation. Many of my summer batches bottled last year have only just reached the 6 month mark, and while that is an important aging milestone for significant improvement of taste, I find myself reluctant to delve into a well-aged bottle a) unless it’s a special occasion and/or I’m sharing with friends, or b) because if I can hold out just a little longer, the one year mark promises an even bigger improvement.

Apple Wine is one of my staples because it is cheap to make (as little as $3, give or take, per gallon), easy to clear, and pretty drinkable even without significant aging. Moreover, the cheaper and easier it is to make, the less I’m concerned with letting it age to full potential. I might set one bottle per batch aside for aging, but the rest gets used up pretty quickly. Some gets made into Sparkling Apple Wine (a fan favorite among my regular group of tasters), some gets consumed as a light, crisp, everyday white, and good bit gets used for cooking. The light, and relatively neutral flavor makes it ideal for recipes when other flavors present a culinary head-scratcher (“Would mango wine taste okay in this risotto?”).

It is also neutral enough to serve as a base for other fruits and flavors, including various spices, citrus and/or vegetables. White grape juice serves a similar function in this regard, but white grape juice is more expensive, clocking in at around $2.50 for a single canister of concentrate (i.e. 2 quarts), where I can get the same amount of apple for 99 cents. The price tag of apple inspires greater risk taking in recipe experimentation.

Let’s start with a basic recipe for Apple Wine:

apple basketBASIC APPLE WINE

2-3 cups of sugar
Champagne yeast
1 or 2 canisters frozen apple juice concentrate
1/2 teaspoon yeast energizer
1/2 teaspoon pectic enzyme
1 or 2 teaspoons acid blend

If you haven’t already, please read my general instructions first, as this and all my recipes will assume previous knowledge of the process of wine making and the equipment necessary.

Start by making a sugar syrup and hydrating your yeast. When I’m using frozen concentrate, I like to thaw it and mix it in with the sugar syrup as it heats in order to sterilize the juice — I started doing this after one batch of apple went bad. You just never know if frozen concentrate has been accidently semi-thawed during transit.

For a one gallon recipe, I use a dusting of yeast, rather than a whole packet. I used to use an entire packet, but I find that a small amount of yeast (say, an 1/8 to a 1/4 of a teaspoon — I don’t measure), if it’s well hydrated ahead of time, will do just fine since yeast multiplies as needed during fermentation.

Measure your additives into a clean and sterile gallon jug using a large funnel. Add the sugar solution and juice when slightly cooled. Fill about 3/4 of the way with water (I use a Brita faucet mount to filter my tap water for wine-making). Feel the side of the jug. If it is still hot to touch, don’t add the yeast. Let it cool to the point where it is only as warm as hand-comfortable tap water.

Add yeast to the cooled-down jug. Fill to about the neck with water. Cover the mouth of the jug with your balloon airlock and secure with a rubberband. At this point I like to label my jug with a large post-it note indicating the type of wine and the start date.

balloonwineFermentation should be in full swing within two days. You know that it is fermenting well when the balloon inflates to the point where it can stand up on its own.

During the warmer weather, my apple wine tends to finish fermentation within a couple weeks, depending on the precise ingredients. Using 3 cups of sugar makes the wine stronger and fermentation takes longer. I found 3 cups a bit too strong for an everyday table wine, so I reduced my regular recipe to 2 cups.

Using one cannister of concentrate produces a very light wine, and some of my tasters have found it a bit too light-bodied for their liking. I’ve also made batches with 2 canisters per gallon; they are certainly more flavorful, but they also come out of fermentation with some harsher notes, requiring a longer aging period to smooth out the flavor profile. The single-canister batches are much more drinkable, even with only a week or so of aging. I’ve also been experimenting with 1.5 canisters per gallon (for which I usually start 2 gallons at a time, dividing three canisters equally among them), hoping for a happy medium.

I’ve also experimented with a number of spices. I’ve done Apple Ginger, Apple Cinnamon, Spiced Apple (with a mulled cider type of spice mix), Apple Cardamom and even Apple Ginger & Cinnamon. In search of a flavor more tartly cider-like, I’ve increased the acid content either by using double my normal amount, or by adding limes and lime juice. I juice the limes (2-3 per gallon) into the jug and then simmer the rinds in with my sugar syrup and juice. I’ve made Apple Lime, Apple Ginger Lime and Apple Cardamom Lime. I was once told that my Apple Lime tastes like a fine Sauvignon Blanc… though, consider that the taster was drunk at the time. My co-worker refers to my Apple Lime as “Corona Wine.”


The newest wrinkle on my apple wine experimentation is to try using a different strain of yeast. When I started wine-making, I used Champagne Yeast for everything. I invested in a supply of Pasteur Red when I pushed my recipes toward deeper blushes and reds. Recently, while browsing wine supplies online, I happened upon a good deal for Montrachet Wine Yeast. According to the description, this yeast aids in developing aroma complexity and aids in producing full-bodied reds OR whites. I decided to try using the montrachet in my latest 5 gallon batch of Apple Wine. The single-canister-per-gallon apple is far from full-bodied, but I was curious if the Montrachet would bring out more flavor. This past weekend I did an initial bottling of this batch. Three gallons went into 15 bottles of Apple Sparkling, while two gallons went into jugs for clearing.

As with many apple batches in the past, these two batches cleared very quickly, and I bottled them only a few days later (in part, anticipating a batch of fondue this weekend for which I’d need some wine, and in part because I’m trying to keep gallons open for when my five gallon Sangiovese kit is done). I’ve sampled a bit already, and I find it… well, so far not that different. Certainly still very light, perhaps a bit cleaner in initial flavor. Aging will likely tell a better tale but, how do I compare it to apple wines that have been aging a longer time or shorter time? It occurs to me that if I truly want to put different yeast strains to the test, I’ll have to start two otherwise identical batches simultaneously to see how they fare side-by-side as they age.

Tough job, somebody’s got to do it…

Also this week…

I started my second wine kit, a 5 gallon batch of Chilean Cabernet Merlot. I added a tablespoon of my own yeast energizer, and fermentation has been vigorous! Perhaps too vigorous… I hate when the fermentation foam froths up so high it leaks out of the pinholes in the balloon.

I bottled a gallon of Mango Guava and a gallon of Apple Ginger Cinnamon as five bottles each of sparkling wine.

My Mango with Montrachet yeast has been transferred to a second jug for clearing.

I started a gallon of Berry Burst Blush with the intention of making it the second entry in Sabrina’s Pink Sparkly Wine Challenge. Also, I am experimenting with a new formulation of a wine I like to call “Strawberry Julius,” the process of making it much improved by the discovery of bentonite! And finally, I am starting a batch of concord red with no acid.


Fresh Salsa

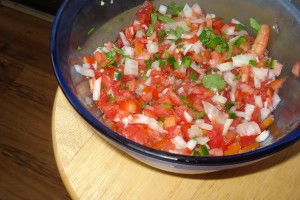
My dad suggested a few weeks ago that we try to make salsa from the vegetables in his garden. I easily got on board with this idea, but had to break it to him that we would need more than his garden offers. Luckily, though, his plentiful tomatoes offered an excellent base for a fundamental salsa recipe.

SalsaI had never made fresh salsa, per se, but I did have some starting expertise from two sources. First, I’ve made a good bit of guacamole in my day, and the ingredients are similar (sans avocado, of course). Second, my friend and chef mentor of yesteryear, Lisa, used to make salsa and advised me on the key to her approach-namely, that vegetables should be diced small in a careful and deliberate way, not pulverized in a food processor. I never attempted salsa back in my college days, but I remembered her advice and remembered the very particular and positive effect it had on her salsa recipe.

SARAH’S FRESH SALSA

4-5 medium tomatoes, just ripe (flesh should be firm, not grainy)
1 large onion
2 teaspoons minced garlic
1-2 jalapenos, or other hot pepper to taste
1 lime
cilantro, several sprigs
salt and pepper, to taste

Quarter the tomatoes, seed them, rinse clean and then place on a paper towels to dry a bit.

Meanwhile, dice the vegetables. All vegetables should be chopped into small pieces, but not so small that they lose their shape (as would happen in pulverized in a food processor). This process isn’t as labor intensive as you might think. Onions can be sliced first to create rings, and the cut into tiny cubes against the grain of its natural layers. Slice peppers in half length-wise, seed them, and then cut long, slender strips. Make slender cuts in the other direction, now, to make small pieces. Once tomatoes have dried a bit, do the same.

Combine diced onion, minced garlic, chopped jalapenos, and chopped tomatoes in a medium bowl. Juice the lime over the bowl. Snip the cilantro into the mix, and season to taste with salt and pepper. Let stand in the refrigerator at least a half hour. I usually try to make it a day ahead of time to let the flavors meld together. Serve with chips or tacos or any dish to which salsa is a good compliment.

Quiche

DSC01469Over the weekend, I found myself planning a brunch menu, and so could not help but be reminded of an old favorite recipe-quiche! Perfect for brunch and very customizable. Of course, a traditional quiche uses a pie crust, but in my experience, the pie crust adds a pretty big extra inconvenience. Not only must it be made and baked first, but the exposed crust must be guarded against getting burnt while the middle of the pie is left uncovered. Unless you have a special pie crust guard, an unwieldy make-shift tin foil guard is necessary. If you’re so intent on a classic pie crust that you’re willing to deal with the annoyance, go right ahead-I recommend buying a pre-made pie shell at the store and preparing it according to package directions. But given my family’s preference toward low carb, I have every reason to eschew the inconvenience of the pie crust and make a crust-less quiche.

My favorite sort of quiche to make is with bacon, but over the weekend I made a vegetarian quiche with spinach. In the past I have combined bacon and spinach, and truly, any combination of vegetables and/or protein would work in this recipe.

SARAH’S QUICHE

butter & almond meal
4 eggs beaten
1 cup light cream or half n half
1/2 cup sour cream
3 or more green onions, chopped or snipped
1 teaspoon paprika
salt and pepper
dash of nutmeg
1/3 lb chopped crisp bacon, or 10oz spinach, or other meat, fish or vegetable
1 1/2 cup shredded swiss or other cheese
1 tablespoon flour

DSC01464Pre-heat oven to 325. Prepare a 9 to 10-inch shallow casserole pan by greasing it with butter and then coat with the almond meal. In the absence of almond meal, breadcrumbs could be used, but that would predictably make the dish a bit higher in carbs.

In a medium bowl combine eggs, cream, onions and spices. Add meat and/or vegetables. In a small bowl or plastic bag, toss the flour with the shredded cheese. Add to the rest of the quiche ingredients.

Pour the quiche contents into the prepared pan. Bake at 325 for at least 45 minutes. Test done-ness by inserting a butter knife in the center. If it comes out clean, it’s done. Otherwise bake for longer, and test every 5 minutes or so.