Cilantro Lime “Rice” and Coconut “Rice”

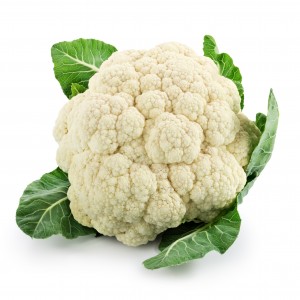
I’ve found that one cauliflower can produce an awful lot of “rice,” especially when it’s on the medium to large side. Depending on the specific plant, I might get 8 or 9 cups of rice out of one head. a162f4b9a88b367e05177701d620261aAs a result, I’ve been splitting my “rice” and using the produce of one head for more than one recipe.
This past weekend, I made myself some favorite Thai-inspired dishes, Pumpkin Curry and Squ-oodles with Peanut Sauce. As an accompaniment to these two dishes, I riced my cauliflower and used the 8 cups of “rice” it produced to make two dishes.

SARAH’S CILANTRO LIME “RICE”

juice and zest of one lime
1 tablespoon oil
1/2 teaspoon salt
fresh ground pepper, to taste
2 tablespoons chopped cilantro or cilantro chutney
2 spring onions, chopped
4 cups cauliflower rice

Rice your cauliflower; fold in a clean kitchen towel and set aside.

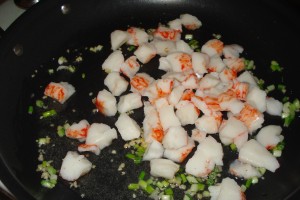
Zest your lime, then juice it (fruit is easier to zest fully round, and easier to juice without the peel). Combine zest, juice, oil, salt, pepper, cilantro or chutney, and onions in a bowl. Add 4 cups of cauliflower rice and stir until the green ingredients are evenly distributed. Enjoy chilled as a salad, or warmed to eating temperature as a side dish.

This dish was pretty predictably delicious. It is, after all, very similar to the basic ingredients in my favorite coleslaw recipe. It was a perfect accompaniment to the curries.

Two "Rice" Dishes, Coconut and Cilantro Lime

Two “Rice” Dishes, Coconut and Cilantro Lime

SARAH’S COCONUT “RICE”

1 tablespoon oil
1 medium onion, chopped fine
1 teaspoon minced garlic
1/2 cup white wine
7 oz coconut cream
4 cups cauliflower rice
salt & pepper, to taste

Rice your cauliflower; fold in a clean kitchen towel and set aside.

Heat the oil in a small saucepan. Saute the onion and garlic. Add the white wine and coconut cream. If your onion was not chopped small enough (my eyes are very sensitive to onion and I can only get a few cuts in before they burn so badly I can’t be in the same room with the onion), you may want to puree the sauce with an immersion blender as it thickens. Simmer, stirring often until reduced into a thick, almost tacky, sauce. Allow to cool; it should be close to room temperature before adding the cauliflower.

Stir in the cauliflower rice. Season to taste. Serve and enjoy.

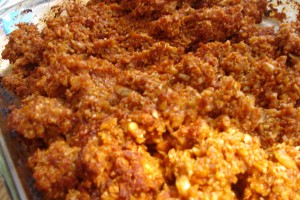
This recipe was a bit trickier. It is based on the concept of coconut-cooked rice that Sabrina introduced to me. Essentially, she cooks rice in an equivalent amount of coconut milk to the amount of water usually required. It has the welcome effects of lowering the glycemic index and adding flavor. I’ve been wanting to do something similar with cauliflower rice for awhile. In fact, it was the first recipe I tried with cauliflower rice. The problem was that I treated the cauliflower rice like regular rice, and it ended up wet and slimy.

With my new-found cauliflower rice expertise, I realized that I had to keep the cauliflower raw and crispy in order for this recipe to work. The key here was taking the time to reduce the sauce. Too much liquid will make this dish runny or soupy. The sauce needs to be thick enough that it will stick to the cauliflower. That’s why I describe it as tacky, sort of like paste or glue. It is also important not to add the cauliflower when this sauce is still hot. The cauliflower will release a bit of liquid if you put it in a hot sauce, making it less than crisp and defeating — at least in part — your efforts at liquid reduction.

Having taken these precautions, I must say that the dish turned out wonderfully, just as I had hoped, a worthy substitute for Sabrina’s Coconut Rice.

Tabbouleh Salad with Cauliflower “Rice”

As it turns out, a full-sized head of cauliflower produces quite a lot of “rice,” and so last weekend I divided what I produced and made a second recipe. This dish continues the trend of using raw cauliflower “rice,” this time to make a low-carb tabbouleh salad. Of course, in this instance, the cauliflower is substituting for bulgur wheat. As a result, this version of tabbouleh with cauliflower “rice” is much simpler to make, as one does not need to cook and then let cool the bulgur.

Make certain you are using fresh parsley for this recipe; tabbouleh traditionally features parsley as the main ingredient, in the same way a standard restaurant salad features lettuce. The amount of parsley is truly up to you. Use more than one bunch if you want to make it more traditional. I simply used as much as my indoor herb garden had to offer.

Tabbouleh Salad

Tabbouleh Salad

SARAH’S TABBOULEH SALAD with CAULIFLOWER “RICE”

3 cups raw cauliflower “rice”
2 lemons, juiced
2 tablespoons olive oil
salt and pepper, to taste
1 bunch of parsley, chopped or snipped finely
4-6 spring onions, chopped or snipped finely
3-4 roma tomatoes, deseeded and diced

Rice your cauliflower in batches, stems separately from florets, in a food processor. Fold into a clean kitchen towel and set aside.

Strain the lemon juice to remove seeds and most of the pulp. In a medium bowl whisk lemon juice, oil, salt and pepper together for the dressing.

Add the cauliflower rice, parsley, spring onions and tomatoes. Stir together until well combined. Store chilled for at least an hour to let the flavors meld. Serve chilled.

I was quite pleased with this recipe. I’m not a huge fan of parsley, but the combination of flavors kept its profile mild in the dish. I found that the amount of lemon juice also cut down on the cauliflower’s natural flavor, which I was worried might be too dominant due to lack of spices or other seasonings. All in all, a very refreshing and tasty dish. It would be a perfect side dish for any Middle Eastern meal, or as a salad for a summer picnic or cook-out.

Vegetable Biryani Cauliflower “Rice”

Encouraged by my most recent attempt at using cauliflower for a rice substitute, I continued my efforts this weekend with yet another rice recipe. While I suspect a similar cooking method to what I used with the Mexican “Rice” would work here, too, I wanted to try keeping the cauliflower raw this time. Due to my recent increase in vegetable consumption, I have discovered that I enjoy more and more vegetables raw or simply warmed to eating temperature, rather than cooked through. I wanted to see if cauliflower “rice” might below to the same category.

It had been quite some time since I’d made Indian-style curries for myself at home, so I resolved to make two favorites from my recipe box this weekend: Chicken Tikka Masala and Saag (Indian Creamed Spinach). What better opportunity to try out another Cauliflower “Rice” recipe than as a curry companion? And so, I struck out into the Internet to research Biryani recipes.

Some elements of this recipe are cooked and some are not. For this reason, the ingredients are divided up in sections.

Vegetable Biryani Cauliflower "Rice"

Vegetable Biryani Cauliflower “Rice”

SARAH’S VEGETABLE BIRYANI with CAULIFLOWER “RICE”

2 lbs. cauliflower, riced

1 tablespoon ginger
2 teaspoons ground cumin
2 teaspoons garam masala
1 teaspoon ground turmeric
1/2 tsp cinnamon
1/4 tsp cardamom
pinch cloves
pinch nutmeg
1/2 teaspoon salt

2 tablespoons oil
1 tsp minced garlic
1 tomato, finely diced
8 oz. frozen small mixed vegetables or soup vegetables (i.e. corn, chopped carrots, green beans, lima beans, peas, etc.)

1 tablespoon oil
1 green onion, sliced thinly
1/4 cup peanuts or mixed nuts
fresh coriander

Rice your cauliflower in batches, doing the stems first and then florets, by pulsing in the food processor. Fold in a clean towel and set aside.

Combine the spices and salt in a small bowl or ramekin. Set aside.

In a medium skillet, heat 2 tablespoons oil. Saute the garlic briefly. Add 1 tablespoon of the spice mix. Stir fry until the spices are coated with oil. Add diced tomatoes and mixed vegetables. Saute until tender.

Meanwhile, in a large bowl, combine raw cauliflower “rice” with 1 tablespoon oil and the remainder of the spice mix. Add green onions and nuts. Stir until evenly distributed.

When the mixed vegetables have reached their desired tenderness, combine the contents of the skillet with with spiced cauliflower “rice” in the large bowl.

Serve with your favorite curries. If desired, warm on an oven-safe dish prior to serving. Garnish with fresh cilantro.

This dish was a smashing success! The spices, the texture, the mix of vegetables and nuts and raw “rice” struck a perfect balance and was an excellent accompaniment to the curries. The first helping I warmed up on an oven-safe plate, but subsequent helpings, I actually just ate at room temperature (the curries I ate with it were hot, after all). Both ways, it was quite delicious, and I think I’m a convert to raw “rice,” as I found the texture much more crisp and rice-like. Also, no worries about over-cooking and the cauliflower shedding too much liquid. Perhaps the most obvious advantage is that keeping the rice raw makes prep incredibly easy! Not having to cook an ingredient simplifies any recipe immensely, especially one where other ingredients (i.e. the vegetables) are cooked separately. After this recipe, I’m excited to try even more cauliflower “rice”!

Loaded Cauliflower Casserole

One discovery I have made again and again when exploring the dietary substitutions inherent in pursuing a new way of eating (e.g. low carb, vegetarian or vegan, etc.) is that sometimes the best meal items and recipes are the ones where the main ingredient isn’t masquerading as a forbidden food. Discovering new ways to enjoy allowed-foods in their own right is often more successful than forcing them into the role of a food that is sorely missed.

This recipe falls into that category. While it is based on recipes for “Loaded Baked Potato Casserole,” the cauliflower in this dish is not made to resemble potatoes, but enjoyed in its full-out floret form!

DSC01996SARAH’S LOADED CAULIFLOWER CASSEROLE

1 lb. cauliflower florets, steamed
1 cup sour cream
1 cup shredded cheese, divided
6 slices of bacon, cooked crisp and crumbled
3 green onions, chopped or snipped fine
salt and pepper
1 tomato, seeded and diced

Preheat oven to 350. Chop cauliflower into pieces and steam to desired tenderness. In a separate bowl, mix together the sour cream, half the cheese, half the bacon, half the green onions, salt and pepper.

Combine cauliflower pieces with sour cream mixture and spread in a baking dish. Sprinkle remaining bacon and cheese on top. Bake for 20 minutes.

Remove from oven. Sprinkle diced tomatoes on top. Return to the oven. Bake and additional five minutes.

Garnish with remaining green onions on top and serve.

Adventures in Cauliflower: Mexican Red “Rice”

I came out of my summer’s week-long vacation with a renewed dedication to low-carb eating. Calorie-counting has become unbearable, and ineffective, since my patiently-awaited weekend splurges turn into overkill, effectively cancelling out the weekday deprivation and counteracting any ground gained. Also, in the effort to avoid unnecessary calories, I found myself avoiding protein-rich foods like meat and fish because of how heavily they weighed on the calorie scale.

Turning again to low-carb living seems the only solution, as it is a diet I can stick to, even over the weekends, where I can “splurge” on richer low-carb foods (or low-carb recipes I don’t have time to make during the week) without actually violating the diet. Weekdays are dedicated to eating comparatively lean meals and many, many vegetables. I’ve discovered, to my surprise, that there are even many vegetables I prefer raw, or almost raw, like diced tomatoes or shredded cabbage, either fresh or slightly warmed.

CauliflowerIn my low-carb experiments, I’ve discovered a number of pretty reasonable substitutes for the usual carb suspects. Cauliflower makes an excellent mashed “potato,” zucchini and other squash and even cabbage put through the spiralizer make great bed of spaghetti, leafy greens are a surprisingly good stand-in for tortillas. Of course, many of these substitutes aren’t meant to taste the same (actually, I find I like the mashed cauliflower better), but to be functional substitutions that taste good in their own right while mimicking the properties of the erstwhile carb.

One carb substitution that has thus far eluded me, however, is finding a good twin for rice. The high glycemic properties of rice can be pretty effectively mitigated by my diabetic friends by cooking it in high fat recipes, such as coconut milk rice or risotto with plenty of butter and cream and cheese. But my motives are fueled by vanity rather than health, and so I’m aiming to give my metabolism some tough love by avoiding anything more carb-rich than your average vegetable in the hopes that it will target the 7-10 pounds causing my vain self to nit-pick.

The most common low-carb suggestion for rice substitution is, once again, cauliflower. While I am extremely happy with its ability to stand in for mashed potatoes, I found my first attempt at cauliflower “rice” a mite disappointing. I endeavored to make a coconut rice on the stovetop. It was tasty enough, but I had texture qualms with the end product. For one, the consistency of the “grain” of the cauliflower rice is… well, inconsistent. I put my cauliflower through the shredder blade of my food processor, and the florets broke up into small pieces, while the stalks were transformed into long shreds, like thickly shredded cheese that never melts. This may just be the perils of using the whole cauliflower, though I will attempt a correction below. Also, the cauliflower, when cooked stovetop in the coconut milk became somewhat limp and somewhat slimy, like cooked cabbage, mushrooms or spinach. I realize, of course, that cauliflower does not have the same liquid-absorbing properties as rice (on the contrary, it has much inherent liquid to shed), but I generally feel that the appeal of many rice dishes (soup and risotto notwithstanding) is the certain dry-ness it provides in contrast to other foods on the plate. Delicate basmati or jasmine rice balances a gravy-like curry, Mexican rice balances creamy re-fried beans and drenched enchiladas, sticky white or fried rice balances a saucy General Tso’s.

Likewise, I would ideally like my cauliflower rice to have the versatility to assume these functions, and so this time, I will attempt a few fixes.

SARAH’S CAULIFLOWER “RICE” MEXICAN-STYLE

1 medium-large head of cauliflower, stems divided from florets
2-4 tablespoons vegetable oil
1 tablespoon minced garlic
1 large onion, chopped
1 or 2 tablespoons chili powder (the Mexican spice mix)
salt to taste
1 (15oz) can of diced tomatoes with juice
1 (6oz) can of tomato paste
1 bouillon cube, chicken or beef, crushed
frozen small mixed vegetables (i.e. corn, peas, diced carrots, etc.), optional

Preheat oven to 400. Rice your cauliflower.

Cauliflower "riced"

Cauliflower “riced”

Okay, at this stage, I’m going to try a different approach than last time. I separated the florets from the stems and I’m going to process the stems first using the regular food processor blade until they are a bit more “riced” than the “cheese shred” cauliflower I got last time. Before putting them in the processor, I additionally cut them into smaller chunks so there wouldn’t be pieces of dramatically different size. I don’t want smaller pieces getting pulverized into cauliflower dust while I wait for the larger pieces to break up. This process worked well to get the cauliflower divided up more evenly. To be honest, the end result really is more like couscous than rice, but at this stage, I say same difference if it turns out well. I also put the cauliflower in a large kitchen towel to absorb extra moisture right after I riced it.

Process the cauliflower stems first in a large food processor, then the florets. Depending on the size of the cauliflower you may need to process in batches. Spread the cauliflower “rice” across a large, shallow backing dish. Toss with oil, garlic, onions and spices. Roast in the oven for 10 minutes, stir, and then return for another 10 minutes.

Meanwhile, combine the remaining ingredients in a medium sized bowl.

I did not use the small mixed vegetables this time around. I also decided to puree the tomato mixture with my immersion blender because the diced tomato pieces were so large.

DSC01983Stir the tomato mixture into the roasted cauliflower rice until well-combined. Return to the oven. Bake uncovered at 400, stirring every 10 minutes, until much of the liquid has evaporated and cauliflower is lightly browned on top. Serve with your favorite Mexican main dish.

This time around, the rice turned out pretty well. My efforts to reduce the liquid in this recipe, and the strategy to bake uncovered eliminated the sliminess of my last attempt. The cauliflower still is not overall as “dry” as rice, but it was a worthy substitute. This recipe gives me hope for future cauliflower “rice” recipes.

Some online recipes for cauliflower rice suggest that it also works well raw, which I imagine is another good strategy for eliminating the sliminess of too much liquid. Perhaps my next attempt will be a raw recipe.

Roasted Cauliflower Salad

This recipe is inspired by Sabrina’s roasted potato salad, a relatively simple and, so it seems, customize-able recipe. It was my favorite item at her picnics all summer, and perhaps one day she will post her recipe for the potato version. Looking for a lower-carb incarnation to make for Saundra, I decided to try using roasted cauliflower instead.

DSC01978

ROASTED CAULIFLOWER SALAD

2 lb. cauliflower florets
olive oil
1/3 to 1/2 lb. bacon, chopped
2-3 green onions, greens and whites, chopped
2-3 hard-cooked eggs
1 (5oz) package of crumbled blue cheese
1-2 cups sour cream
salt & pepper to taste

Preheat oven to 400. Toss florets with olive oil to coat. Roast them on a cooking sheet or in a shallow pan for 15-20 minutes, or until lightly browned. Chill the cauliflower.

Meanwhile, fry the chopped bacon until crisp. Drain the bacon grease and reserve for other purposes. Peel the hard-cooked eggs and chop into chunks (about 6, depending on the size of the egg). Combine bacon, eggs, onions, and cheese in a medium-sized bowl. Add cauliflower once chilled. Stir in enough sour cream to coat. Season to taste and serve chilled.

Mornay Sauce for Seafood or Pasta

In my general browsing of recipes online, I found myself encountering the term “Mornay,” especially in seafood dishes, such as Crab Mornay or Salmon Mornay. Further research shows that it is — perhaps unsurprisingly — French in origin, a culinary outgrowth of Bechamel sauce, a basic white sauce (butter, flour, milk) that is a core element of French cooking, and that surfaces more widely in recipes of broader Continental origin.

Apparently Mornay is just Bechamel with cheese. The types of cheese used in recipes vary, but the one I seem most commonly is Swiss. I’ve seen it included in recipes to be poured over fish filets, seafood croquettes or crab cakes, even seafood crepes. It doesn’t seem to be used, traditionally, as a sauce for pasta, but its consistency as a cheesy sauce, it seems to me, invites the correlation that Swiss is to Mornay, as Parmesan is to Alfredo, as Cheddar is to Mac & Cheese, etc. Having tried it over pasta, I’m sold! My favorite way to make it, and preserve its longstanding connection to seafood, is to add faux crab and green onions:

DSC01892SARAH’S “CRAB” MORNAY

2 tablespoons butter
1 tablespoon white flour
1/2 cup white wine (optional)
2 cups half & half or cream
8 oz Swiss cheese (Gruyere is most traditional)
2-3 green onions, snipped or sliced
8 oz to 1 lb. faux crab, chunk style, or other seafood
salt & pepper to taste
pasta or bread
parsley

Melt the butter in a medium saucepan. When it is just melted, add the flour and stir until all lumps are broken up. If you’re going to add some wine, make sure it is a light-bodied white so as not to compete with the subtle flavors of the swiss cheese. Heat the wine through and then add the cream and the cheese. I have gathered from looking at several recipes that Gruyere is the variety of Swiss cheese that is considered most traditional, but it can be pretty expensive. Any type of Swiss — or a combination of Swiss cheeses — will do. I use just plain ol’ low-brow brick o’ grocery store Swiss, but don’t rule out a Gruyere or an Emmenthaler or a Jarlsberg as a higher-brow option.

Heat the cream & cheese mixture on medium-low fire in order to soften the cheese. Meanwhile, snip the onions into a bowl and set aside. When the cheese is visibly melting, puree the sauce with an immersion blender to smooth out all the lumps. After the sauce is pureed, add your fish, if you’re using shellfish or faux crab. If you’re making this sauce to top a fish filet, crab cake or seafood croquette, then prepare the fish separately.

Once the sauce is thickened and heated through, add most of the snipped green onions (reserve some for garnish, if you like), salt and pepper. Serve tossed with pasta, over prepared fish and/or with crusty bread. Garnish with parsley.

To be honest, having read a lot of Crab Mornay recipes, I’m not sure what to make of their serving suggestions. Nobody but me seems to have had the idea to serve over pasta. Fair enough. I’ve done pasta but I have also used it (sans faux crab) as a sauce for salmon croquettes. Some of the recipes I’ve read involve serving it over seafood crepes, sometimes with mushrooms added to the crepes or the sauce. Again, seems logical. However, a majority of recipes suggest serving with “crusty bread” or in “a bread bowl.” Are people eating their Crab Mornay like a soup? Or, perhaps, making it thicker for use as a dip (I don’t add as much flour as some recipes because of carbs, but also so it will be pour-able enough to work as a pasta sauce)? I suppose it would be tasty as a fondue, though having larger fish chunks in a fondue seems cumbersome, unless they are also reserved and served on the side for dipping.

The mystery of Mornay will persist, but I’m advocating here and now that we add it to the canon of classic pasta sauces! This simple sauce is quite delicious; cheese lovers rejoice!

Hummus Mastery

I’ve blogged basic hummus recipes before, and while I was never displeased with my hummus creations, I never stopped experimenting with this fundamental recipe. My primary goal in working on this recipe was to create a smoother hummus. Word on the street was that using dried garbanzos, as opposed to canned, would yield a smooth result. I did not find this to be true, but I did find that getting the proportions right with dried beans and balancing it all with the rehydration process was just not worth the trouble. The results I got weren’t especially smooth and the quality was spotty. I eventually scrapped the notion of using dried beans.

All this trial and error resulted in much extra hummus being produced, so I ended up bringing my experiments to work to unload on my co-workers. One of my co-workers at the time, Scott, is a vegan, but also a former employee at Aladdin’s Eatery, a Middle Eastern chain restaurant in our area. As chains go it is actually quite good due to their emphasis on natural foods and ingredients, and I have long admired their hummus and baba. What Scott revealed to me about the way they make hummus was positively shocking… they don’t use garlic. He told me that garlic is in fact not a standard ingredient in traditional hummus. Every recipe for hummus I have seem in my life uses garlic; how garlic weaseled its way into the standard ingredient list, I do not know. It’s not that hummus is bad with garlic. It can be quite tasty. But what I discovered following Scott’s revelation is that hummus can be even better without!

healthy-hummus-recipesSARAH’S MASTERFUL HUMMUS

1 (15oz) can of Trader Joe’s Garbanzo Beans, rinsed and drained
3 tablespoons sesame tahini
1/3 cup olive oil
juice of one or two lemons
1/2 teaspoon salt
dash of cumin
1/4 cup water
paprika, for garnish

Combine the garbanzos, tahini and oil in the food processor. Juice the lemons, making sure to strain out the seeds. Add lemon juice, salt and cumin to the processor. I usually use 1/4 cup of water, but you may want to use more or less, depending on the consistency you want. If you like a thicker hummus, add less. I recommend adding water one tablespoon at a time while processing to find out how much you need to reach your desired consistency. Adding more liquid will also enable the food processor to make the hummus smoother. Serve with chips or pita bread, garnish with paprika and drizzled olive oil.

I have tweaked this recipe many times, and have done side-by-side comparisons with Aladdin’s hummus (I make a batch for comparison whenever I get Aladdin’s take-out). Over this past weekend I did the same, and it’s finally gotten to the point where they are nearly indistinguishable. Any subtle difference in flavor is probably due to differing source ingredients (I’m sure I don’t use the exact same tahini brand as they do, for example), but the general balance of flavors is the same.

If you don’t have a Trader Joe’s nearby, you can, of course, use another brand of garbanzos, but I would recommend using them if you have a TJ in town. I discovered that Trader Joe’s garbanzos are significantly better tasting than other brands of canned beans after using them in my Garbanzo Salad. They are the only garbanzos I will use, now, for the salad, and they make a big flavor difference in the hummus, too.

One final note about the lemons: I usually double this recipe and use three lemons, so technically, I use one and a half lemons for a recipe of this size, but the flexibility to go up or down in lemon flavor is up to you!

Pad Thai Noodles

I’ve made a couple attempts at Pad Thai with different recipes I’ve encountered online. I can’t say previous attempts were failures, but while enjoyable enough, they just didn’t turn out quite right. This time around, I compared and contrasted a few recipes (including the one I had used the last time), and put together a list of ingredients based on what had worked and what hadn’t during my last attempts. I was quite pleased with the result:

DSC01870SARAH’S PAD THAI

8 oz rice noodles
1/2 cup crushed peanuts (or more, to taste)
2 tablespoons oil
2 teaspoons minced garlic
3-5 green onions, snipped or sliced
8 oz or 1 lb. of shellfish, meat, faux crab, tofu, etc.
3 tablespoons lime juice
2 tablespoons fish sauce
1 tablespoon brown sugar
1 teaspoon tamarind concentrate
1 tablespoon sriracha sauce
4-6 eggs
1-2 limes
cilantro

Soak the rice noodles in warm water for about 30 minutes, then drain and rinse in cold water. Set aside.

At the same time, in a small non-stick skillet, toast the crushed peanuts dry on a low heat, stirring every so often.

DSC01867In a large skillet, heat the oil. Snip the roots off the white ends of the green onions. As I’ve mentioned in previous blogs (most recently my recipe for African Peanut Soup), I like to use kitchen scissors for snipping herbs and spring onions. Using scissors will make it very easy to separate the whites from the greens in this recipe. Just snip the onions, starting at the white end, into the saucepan. When you get to the green part of the onions, simply move to a bowl and snip the remainder of the onion to reserve the greens for later.

Saute the white snips of the onion with the minced garlic for a minute or two. Add your meat, fish, etc. and saute until cooked. I used an 8oz package of faux crab, chunk style (I don’t like how the flake style falls apart), and so did not have to cook it long, just to heat through.

Meanwhile, in a small bowl, mix together the ingredients for the sauce: lime juice, fish sauce, brown sugar, tamarind and sriracha. Mix until brown sugar is dissolved. Add the drained noodles to the pan; stir fry for a minute or two, then add the sauce. Reduce heat to low.

DSC01868Mix about half of the toasted peanuts in with the noodles. Reserve the other half in a small bowl and set aside. Use the small skillet to fry the eggs (no need to wash first). I like to mix the eggs with a little extra fish sauce before scrambling. I used 6 eggs because I only used 8 oz of fish, but you can use fewer eggs if you’re using a larger amount of meat or fish. I also added a touch of additional vegetable oil to the pan before scrambling. Stir the eggs in with the noodles once they are scrambled.

Once your stir-fry is heated through, garnish with the reserved peanuts and green onions, and fresh cilantro if you have some on hand (I didn’t this last time and it was perfectly tasty without). Quarter your limes and serve with lime wedges to be squeezed over the noodles before eating.

I didn’t have terribly high hopes for this recipe since it is quite a complex dish and it comes from a cuisine tradition that I have otherwise found difficult to reproduce with great authenticity.

I must say, however, I was quite surprised with how this recipe turned out. It looked like Pad Thai I’ve had in restaurants, and it was extremely tasty. I found myself going back for more time and again throughout the day, eating much more of it than I had intended (sorry, diet!). Pad Thai itself varies from restaurant to restaurant, and I haven’t had a restaurant version terribly recently for comparison, but I found this recipe so delicious that I frankly did not care how close it was in authenticity to my favorite restaurants. I suspect I will be making this dish again very soon!

Gorgonzola Cream Sauce

This cream sauce may very well be the most delicious pasta sauce I’ve ever had in my life. Move over alfredo! If you like cheeses with a stronger flavor, this gorgonzola sauce will be right up your alley.

Sarah’s Gorgonzola Cream Sauce

gorgonzola2 tablespoons butter
1/4 teaspoon minced garlic
1/3 cup white wine (optional)
8 oz grumbled gorgonzola (or more to taste)
1 cup half n’ half or cream
ground pepper

Melt the butter in a medium/small saucepan. Add the garlic and saute briefly. This might seem like an exceedingly small amount of garlic, but with the gorgonzola cheese, it can very easily become overpowering and add an unpleasant and unintended saltiness to the flavor of the sauce. After a minute or so, add the white wine. Simmer another minute or so, then add the cream and gorgonzola crumbles. Season with pepper. Heat over low fire to melt the gorgonzola. I like to use my immersion blender to help the melting process along and produce a very smooth sauce, but you can also let the cheese melt only partially if you want a more textured sauce with a few gorgonzola lumps remaining. Serve over pasta al dente.